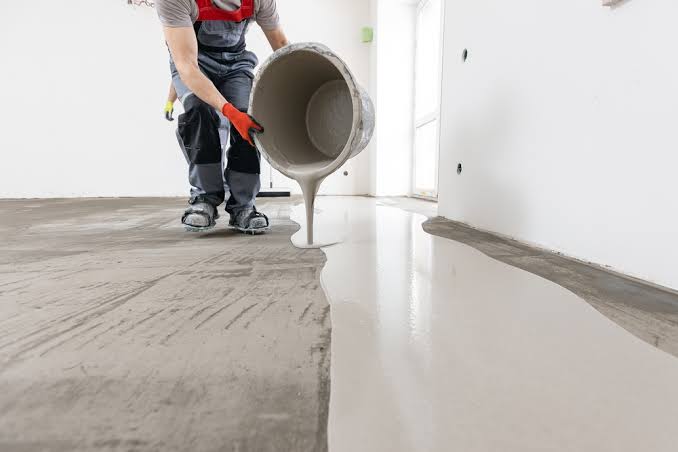

Floor leveling compound is a leveling, smoothing, or patching material used to correct dips, waves, gouges, and other irregularities in a subfloor. It creates a sufficiently flat and stable surface for vinyl, laminate, carpet, tile, wood flooring, and other finished floor coverings.
However, floor leveling compound is not one universal product. Self-leveling underlayments, trowel-applied patching compounds, wood-subfloor systems, and exposed concrete toppings all serve different purposes. A product that works on concrete may not be suitable for plywood, OSB, old tile, terrazzo, or adhesive residue.
Preparation is therefore just as important as the compound itself. The substrate must be structurally sound, stable, clean, dry enough for the selected system, and compatible with the product. Primer, water ratio, application thickness, working time, and drying time must follow the manufacturer’s current instructions.
Floor Leveling Compound at a Glance
| Feature | Information |
| Main purpose | Correct low spots and create a flat flooring substrate |
| Common product types | Self-leveling underlayment, patching compound, wood-subfloor leveler, exposed topping |
| Typical composition | Cement, hydraulic binders, fine aggregates, and polymers |
| Common substrates | Concrete, screed, approved plywood, selected OSB, terrazzo, and prepared tile |
| Suitable floor coverings | Vinyl, LVP, laminate, carpet, tile, and some wood flooring systems |
| Application method | Pouring, spreading, raking, or troweling |
| Most important preparation step | Confirming substrate strength, cleanliness, moisture condition, and product compatibility |
| Most common mistake | Using the wrong product, adding too much water, or skipping primer |
| Permanent wear surface? | Usually not, unless the product is specifically approved as an exposed topping |
What Is Floor Leveling Compound?
Floor leveling compound is a general term for materials designed to fill low areas and smooth uneven subfloors. Many products are sold as dry powder and mixed with a precisely measured amount of water before installation.
Depending on the formulation, the mixed material may become highly fluid or remain thick enough to apply with a trowel. A self-leveling underlayment is normally used over larger areas, while a patching compound is better for isolated holes, transitions, edges, and small depressions.
For example, MAPEI describes Planipatch as a fast-setting, polymer-modified, cement-based patching compound. ARDEX K 15 belongs to a different category: it is a self-leveling underlayment intended for broader floor preparation. The two products are not interchangeable simply because both can smooth a substrate.
Is Floor Leveling Compound Self-Leveling?
Not every floor leveling compound is self-leveling. The term is often used loosely for several different products.
A true self-leveling underlayment has a relatively fluid consistency. After it is poured, it flows across the floor and settles within its designed thickness range. Even so, it normally requires guidance with a gauge rake, smoother, or other approved tool.
A trowel-applied patching compound is thicker and more controlled. It is usually better for:
- Individual holes
- Small depressions
- Damaged edges
- Height transitions
- Localized gouges
- Thin tapered repairs
The term “self-leveling” does not mean the product can be poured onto an unprepared floor and automatically produce a perfect result. The substrate must be sealed where necessary, the water ratio must be exact, and adjacent batches must be placed within the available working time.
Flat and Level Are Not the Same
Before selecting a floor leveling compound, determine whether the floor needs to be flat, level, or both.
A floor is flat when it does not contain excessive waves, humps, dips, or abrupt height changes within a specified distance. It may still have a consistent slope.
A floor is level when the entire surface lies on the same horizontal plane.
Most floor coverings require a flat substrate, but they do not always require the room to be perfectly level. The National Wood Flooring Association also distinguishes flatness from levelness and provides different substrate tolerances depending on the installation method and fastener type. The flooring manufacturer’s requirements should always take priority.
This difference is particularly important in:
- Garages
- Basements
- Showers
- Laundry rooms
- Workshops
- Balconies
- Rooms with floor drains
In these locations, a slope may have been created intentionally to move water toward a doorway or drain. Pouring a self-leveling compound across the entire area could remove that slope and create new drainage problems.
Types of Floor Leveling Compound
Self-Leveling Underlayment
Self-leveling underlayment is normally used across larger areas. It is useful when the floor has several low spots or widespread waviness.
Common uses include preparation:
- Before vinyl or LVP
- Under laminate
- Before carpet
- Under large-format tile
- Before glue-down wood flooring
- Over prepared concrete
ARDEX K 15 is one example of a self-leveling underlayment designed for approved prepared substrates. Its strength, walk-on time, application limits, and floor-covering installation time are specific to that product and should not be applied to every self-leveler.
Trowel-Applied Patching Compound
A patching compound is applied with a smoothing trowel. It is better suited to small areas and localized damage.
Typical uses include:
- Small holes
- Narrow depressions
- Minor cracks or voids
- Damaged screed edges
- Transition areas
- Thin tapered repairs
MAPEI Planipatch is an example of a fast-setting cement-based patching and smoothing compound. It is not simply a pourable, full-room self-leveler.
Floor Leveling Compound for Wood Subfloors
Some products are designed specifically for plywood, OSB, or other approved wood-based substrates. Others are intended only for concrete and mineral surfaces.
Wood-subfloor systems may require:
- A specified primer
- A minimum application thickness
- Reinforcing lath
- Sealed panel joints
- Additional fastening
- Specific plywood or OSB grades
ARDEX TL WOOD is one example of a product intended for structurally sound wood substrates. ARDEX Liquid BackerBoard is another system designed for certain wood and concrete applications.
The fact that one product is approved for wood does not mean all self-leveling compounds can be applied over plywood or OSB.
Exposed Floor Topping
Most self-leveling underlayments are not finished floors. They are designed to be covered with tile, vinyl, carpet, wood, or another flooring material.
Some manufacturers explicitly state that their underlayments are not permanent wear surfaces, even if they are sealed or coated. Products such as ARDEX K 301 and MAPEI Ultratop belong to a different category. They are purpose-designed toppings for exposed residential, commercial, or light-industrial use within their stated limitations.
This distinction is especially important in garages, workshops, warehouses, and utility rooms.
When Is Floor Leveling Compound Needed?
Floor leveling compound is needed when the substrate falls outside the flatness tolerance required by the new floor covering.
Possible warning signs include:
- Laminate flexes underfoot
- Click joints move or separate
- Vinyl planks open at the seams
- Thin vinyl shows depressions underneath
- Tile sounds hollow
- Tile or grout develops cracks
- Carpet ripples or wears unevenly
- Furniture or machinery sits unsteadily
- Office chairs roll in one direction
- Water collects in isolated low spots
A floor should not be judged by appearance alone. The surface should be measured and compared with the flooring manufacturer’s published flatness requirements.
When Floor Leveling Compound Is Not Enough
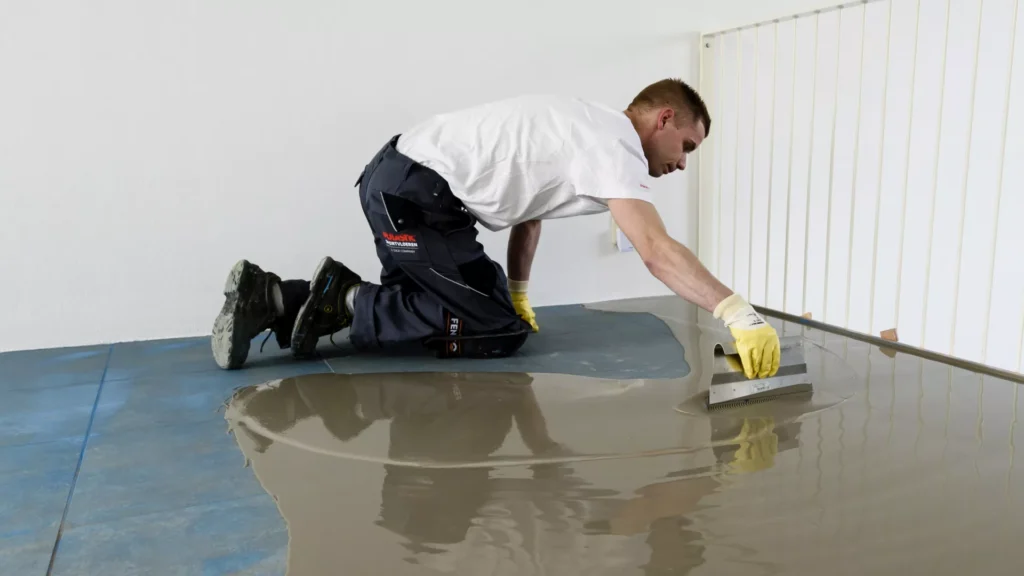
Floor leveling compound corrects surface irregularities. It does not repair structural problems.
It is not the right solution for:
- Broken or sagging joists
- Rotten plywood
- Swollen OSB
- Loose subfloor panels
- Continuing water damage
- Active structural cracks
- Excessive floor deflection
- Foundation settlement
- Weak or crumbling screed
- Hydrostatic pressure
A hard cementitious layer placed over a moving substrate may crack, loosen, or damage the finished flooring above it.
Damaged wood panels may need to be removed and replaced. Replacement panels require proper support, suitable thickness, correct panel grade, and an appropriate fastening schedule.
Which Substrates Can Accept Floor Leveling Compound?
Concrete
Concrete is the most common substrate for floor leveling compound, but it must still be inspected and prepared correctly.
Check for:
- Weak or dusty surfaces
- Cracks and movement joints
- Oil, grease, or wax
- Old coatings
- Adhesive residue
- Moisture
- Loose or crumbling material
Active expansion and movement joints should not normally be covered rigidly unless the selected flooring system specifically allows it.
Screed
Cement screed, calcium sulfate screed, and other screed types react differently to moisture, primers, and cement-based materials.
The selected leveling compound must be approved for the exact screed type. Highly absorbent or moisture-sensitive screeds may require a special primer or preparation system.
Plywood
Floor leveling compound may be installed over plywood only when the product manufacturer explicitly approves that substrate.
The plywood should be:
- Structurally sound
- Firmly fastened
- Free from vertical movement
- Clean and dry
- Of an approved grade
- Thick enough for the intended flooring system
Primer, reinforcing lath, minimum thickness, or additional fastening may also be required.
OSB
OSB can expand or swell when exposed to moisture, especially at panel edges. A compound approved for plywood is not automatically approved for OSB.
Some specialty products permit installation over structurally sound OSB. Many others exclude it entirely.
Existing Tile and Terrazzo
Some compounds may be used over existing tile or terrazzo if the surface is fully bonded, clean, stable, and prepared as required.
Loose, cracked, or hollow-sounding tiles should be removed or repaired. A specialty bonding primer may also be necessary.
Adhesive Residue
Not every adhesive residue can remain in place. Water-soluble, soft, weak, or contaminated residues can interfere with bonding.
Some systems permit installation over selected, firmly bonded adhesive residues after proper preparation. The product data sheet should state which adhesive types are acceptable.
Floor Leveling Compound for Different Flooring Materials
Vinyl and LVP
Thin vinyl flooring can reveal joints, depressions, patch edges, and other imperfections from the substrate below. This is commonly called telegraphing.
Click-lock LVP also requires consistent support. If the planks bridge low spots, they may flex whenever someone walks across them. Repeated movement can damage the locking joints.
Laminate
Laminate is commonly installed as a floating floor. The subfloor must therefore be flat enough to support the panels evenly.
Thick foam underlayment is not a substitute for proper floor preparation. It may absorb tiny surface textures, but it cannot reliably bridge deep dips, hard ridges, loose panels, or structural damage.
Tile and Natural Stone
Tile requires a firm, stable, and sufficiently flat substrate. Large-format tile is particularly sensitive to humps and dips.
Leveling compound can make installation easier and reduce the need for excessively thick mortar. It does not replace waterproofing, crack isolation, uncoupling, or structural reinforcement when those systems are required.
Carpet
Carpet can visually hide minor irregularities, but significant depressions may still cause uneven wear, unstable furniture, soft spots, or visible rippling.
Nail-Down Wood Flooring
Nail-down hardwood requires special caution. Ordinary self-leveling underlayments are generally not designed to be penetrated by flooring cleats or staples.
Every additional layer also reduces fastener penetration into the structural wood subfloor. This may weaken holding power or contribute to squeaks and movement.
The National Wood Flooring Association notes that self-leveling materials are not normally recommended over dimensionally unstable wood substrates and generally cannot simply be nailed through. Written approval should be obtained before using any cementitious patch beneath a nail-down system.
Is There a Nailable Floor Leveling Compound?
The phrase “nailable floor leveling compound” often appears in older forums and DIY discussions. Some users claim that certain cement-based patching products can be nailed through without problems.
That claim should not be generalized.
A product may be approved for installation over plywood without being approved for penetration by flooring nails, cleats, or staples. A thin, brittle patch may crack, break, or deflect fasteners.
Before installing nail-down hardwood over any repaired area, confirm:
- Whether the patch manufacturer permits fasteners through the cured material
- Whether the flooring manufacturer accepts the proposed substrate system
- Whether the nails or staples will still penetrate deeply enough into structural wood
- Whether the patch is fully bonded to the substrate
- Whether movement, cracking, or noise may develop
Without clear written approval, mechanical corrections such as sanding, wood shims, plywood repairs, sleepers, or other approved wood-based methods may be more predictable.
How to Choose the Right Floor Leveling Compound
| Situation | Commonly Suitable Product Type |
| One small hole | Trowel-applied patching compound |
| Narrow deep depression | Patching compound or standable repair mortar |
| Large wavy concrete area | Self-leveling underlayment |
| Plywood subfloor | Product specifically approved for plywood |
| OSB subfloor | Product specifically approved for OSB |
| Thin tapered edge | Feather-edge patching compound |
| Exposed garage floor | Approved topping or coating system |
| Preparation before vinyl | Fine, smooth patch or underlayment |
| Large-format tile | High-strength, sufficiently flat underlayment |
| Nail-down hardwood | Mechanical correction or a fully approved system |
Before purchasing, check:
- Approved substrates
- Minimum thickness
- Maximum thickness
- Feather-edge capability
- Primer requirements
- Moisture limitations
- Working time
- Walk-on time
- Floor-covering installation time
- Interior or exterior suitability
- Approval as an exposed wear surface
Tools and Materials You May Need
Depending on the product and project, you may need:
- Long straightedge
- Laser level
- Water level
- Feeler gauge or measuring wedge
- HEPA-capable dust extractor
- Grinder with dust shroud
- Mixing drill
- Clean buckets
- Accurate water-measuring container
- Smoothing trowel
- Gauge rake
- Spiked roller, where specified
- Spiked shoes for larger pours
- Compatible primer
- Edge foam or sealing material
- Waterproof gloves
- Safety glasses
- Suitable respiratory protection
Tools must be clean. Cured residue on a bucket or mixing paddle can shorten the working time of a fresh batch.
Preparing the Subfloor
1. Measure the Floor
Place a long straightedge across the floor in several directions. Mark high and low areas.
A laser can also show whether the entire room slopes. This helps distinguish general slope from local waviness.
2. Identify the Cause
Determine whether the irregularity comes from:
- A surface depression
- A high panel seam
- Damaged subflooring
- Structural movement
- Settlement
- Moisture damage
The cause determines the correct repair.
3. Reduce High Areas
It is often more economical to grind or sand high areas than to raise the entire floor to the highest point.
Wood panel seams may sometimes be sanded carefully, provided the panels remain thick and structurally sound.
4. Remove Contaminants
Dust, paint, oil, wax, grease, sealers, and weak adhesive residues can prevent bonding.
The surface should be mechanically or chemically prepared in accordance with the product data sheet.
5. Treat Cracks and Openings
Fluid underlayment can escape through very small openings. Seal:
- Pipe penetrations
- Perimeter gaps
- Panel joints
- Doorways
- Stair openings
- Floor vents
Do not rigidly bridge active movement joints unless the system manufacturer specifically permits it.
6. Test for Moisture
A concrete surface can appear dry while still containing too much moisture for the underlayment, adhesive, or finished floor.
Testing methods and limits depend on the selected system. Floor leveling compound is not automatically a moisture barrier.
7. Apply the Correct Primer
Many floor leveling compounds require primer. Primer improves adhesion and controls substrate absorption.
Use only the primer specified for the compound and substrate. Follow the required dilution, coverage rate, drying time, and application method.
How to Apply Floor Leveling Compound
Step 1: Calculate Material Requirements
Measure the floor area and estimate the average application thickness.
Use the coverage chart from the exact product. Coverage varies according to density, bag size, and depth.
Buy a small reserve. Running out of material halfway through a self-leveling pour can create cold joints and uneven transitions.
Step 2: Prepare the Work Area
Remove furniture, doors, tools, and loose items. Place all buckets, water, and tools nearby before mixing.
On larger jobs, several people may be needed. One person can measure and mix while another pours and spreads.
Step 3: Measure the Water Accurately
Do not add extra water simply to improve flow.
Too much water can:
- Reduce strength
- Cause segregation
- Create a soft surface
- Delay drying
- Increase shrinkage
Too little water can also be a problem because the product may not flow or bond as intended.
Step 4: Mix the Compound
Add the powder and water in the order specified by the manufacturer.
Use the recommended mixing speed and time. Avoid whipping excessive air into the mixture.
Step 5: Pour Immediately
Begin at the farthest point in the room and work toward the exit.
Place adjacent batches quickly enough that the edges remain wet and blend together.
Step 6: Spread the Material
Guide the compound with the specified tool, such as:
- Gauge rake
- Smoothing trowel
- Spreader
- Spiked roller
Do not overwork the material. Excessive movement can introduce air or interfere with flow.
Step 7: Protect the Surface
Do not walk on the fresh compound unless the system specifically permits spiked shoes or another installation method.
Protect the area from:
- Drafts
- Direct sunlight
- Frost
- Excessive heat
- Dust
- Water
- Premature traffic
Step 8: Allow Proper Drying
Walk-on time and floor-covering installation time are not the same.
A surface may be firm enough to walk on while still containing too much moisture for vinyl, wood, or adhesive. Always follow the exact technical data sheet.
How Long Does Floor Leveling Compound Take to Dry?
Drying time depends on:
- Product formulation
- Application thickness
- Substrate temperature
- Room temperature
- Relative humidity
- Substrate absorption
- Air movement
- Type of finished flooring
A thin patch may be ready quickly, while a deeper pour can require much longer.
Do not judge readiness only by color, hardness, or surface appearance. Use the manufacturer’s published floor-covering installation time and any required moisture testing.
Common Floor Leveling Compound Mistakes
Using the Wrong Product
A patching compound is not automatically suitable for a full-room pour. Likewise, a self-leveling underlayment is not necessarily durable enough to serve as an exposed workshop floor.
Failing to Inspect the Substrate
Leveling compound cannot stabilize rotten wood, active cracks, loose panels, or severe structural movement.
Skipping Primer
Without the required primer, the compound may lose water too quickly or fail to bond properly.
Adding Too Much Water
Extra water may make the material easier to pour, but it can weaken the cured surface.
Mixing Too Much at Once
Many products have short working times. A large batch may begin setting before it can be placed.
Retempering Material
Do not add water to compound that has already begun to set. This can seriously reduce performance.
Exceeding the Maximum Thickness
Every product has its own thickness limits. Deep areas may require multiple lifts, aggregate extension, or another repair system.
Assuming Every Product Can Feather Edge
Some patching compounds can be tapered to nearly zero thickness. Others require a minimum depth or a separate finishing patch.
Installing Flooring Too Soon
Residual moisture can affect adhesives, discolor floor coverings, or weaken the bond between layers.
Using Drywall Joint Compound
Drywall joint compound is designed for gypsum wallboard joints and repairs. It is not a dependable load-bearing floor patch.
It may:
- Shrink
- Powder
- Soften with moisture
- Crush under traffic
- Separate from the substrate
Using Foam Underlayment as a Leveler
Foam underlayment may absorb minor texture, but it cannot repair deep dips, sharp ridges, unsupported panels, or structural damage.
Floor Leveling Compound Safety
Dry cement-based powders can release dust during opening, pouring, and mixing. Grinding, sanding, drilling, or removing cured cementitious products may also release respirable crystalline silica.
OSHA identifies cutting, grinding, drilling, and disturbing concrete, mortar, stone, and similar materials as potential sources of respirable silica. Exposure can cause silicosis, lung cancer, chronic obstructive pulmonary disease, and kidney disease.
Wet cementitious material is also hazardous. It is highly alkaline and may cause serious skin burns and eye damage.
Basic precautions include:
- Read the current safety data sheet
- Minimize dust
- Pour powder slowly
- Use appropriate dust extraction
- Avoid dry sweeping
- Wear sealed eye protection
- Wear waterproof gloves
- Prevent skin contact
- Wash contaminated skin promptly
- Use respiratory protection suitable for the exposure
A basic household vacuum or disposable paper mask should not automatically be considered adequate for concrete grinding.
Floor Leveling Compound in Garages and Workshops
A garage or workshop does not always require full-floor leveling.
When only a lathe, milling machine, workbench, or storage cabinet sits unevenly, local correction may be more practical.
Possible methods include:
- Adjustable machine feet
- Steel bearing plates
- Precision shims
- Wedges
- Non-shrink grout pads
- Engineered machine mounts
For precision machinery, leveling may involve more than making the cabinet appear horizontal. A lathe may need to be adjusted to reduce bed twist and maintain alignment.
If the entire garage floor is being resurfaced, consider:
- Drainage slope
- Concentrated machine loads
- Rolling tool cabinets
- Vehicle traffic
- Oil and coolant
- Abrasion
- Impact
- Slip resistance
- Moisture
- Freeze-thaw exposure
A standard underlayment is often not suitable as the final garage floor. Use a purpose-designed topping or coating system approved for the expected service conditions.
Alternatives to Floor Leveling Compound
Not every uneven floor requires a self-leveling pour.
Grind High Spots
Grinding can reduce material use and preserve an existing drainage slope. Proper silica-dust controls are necessary.
Use a Patching Compound
For one or two localized depressions, a trowel-applied patch may be easier and more economical.
Replace Damaged Plywood
Rotten, delaminated, swollen, or unsupported wood should be repaired or replaced rather than covered.
Install an Approved Plywood Overlay
A suitable overlay can create a smoother surface, but it will not necessarily correct severe waves or structural sagging.
Correct the Framing
Large height differences may require joist repair, reinforcement, shimming, sistering, or another framing correction.
Level Machinery Separately
In workshops, leveling individual machines may be more practical than resurfacing the entire slab.
How Much Floor Leveling Compound Do You Need?
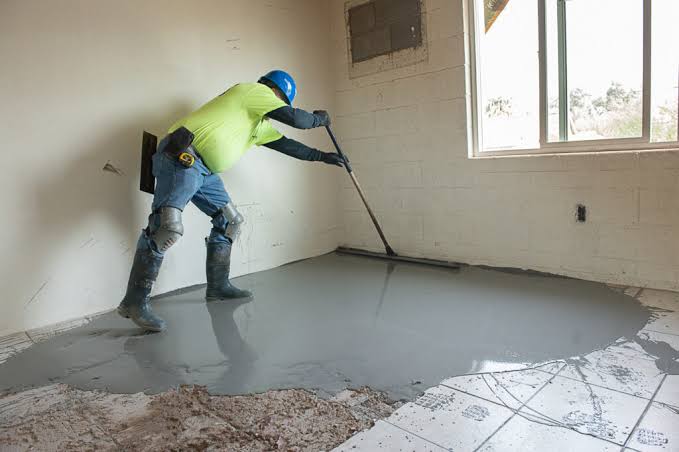
Material quantity depends on the floor area and average application depth.
Use this process:
- Measure the room
- Map high and low spots
- Estimate the average fill depth
- Check the product coverage chart
- Allow for waste
- Buy a small reserve
Do not calculate material based only on the deepest point. A small deep depression uses much less compound than a full-room layer of the same depth.
How Much Does Floor Leveling Compound Cost?
The total cost involves more than the price per bag.
Main cost factors include:
- Room size
- Average depth
- Maximum depth
- Product type
- Primer
- Grinding
- Coating removal
- Adhesive removal
- Crack repairs
- Wood-subfloor repairs
- Moisture testing
- Moisture mitigation
- Labor
- Pumping equipment
- Access to the work area
A localized patch is usually much less expensive than leveling an entire badly wavy floor.
Deep areas may also require a coarse repair system, aggregate extension, screed, or another buildup method rather than standard self-leveling compound.
DIY or Professional Installation?
A small floor-leveling project may be suitable for DIY work when:
- The substrate is stable
- The cause of the unevenness is clear
- Only a small area is affected
- The product has a manageable working time
- The required tools are available
Professional installation may be preferable when:
- A large area must be poured
- Height differences are substantial
- Moisture is suspected
- Structural damage is present
- Several batches must blend continuously
- A wood subfloor is involved
- The surface will remain exposed
- Heavy machinery will be installed
- An expensive finished floor is planned
On larger pours, even a brief delay between batches can create visible ridges or cold joints.
Frequently Asked Questions
Floor leveling compound is a material used to fill low spots, smooth irregularities, and prepare a flat substrate before finished flooring is installed.
Not always. Floor leveling compound is a broader term that includes self-leveling underlayments and trowel-applied patching compounds.
Only when the concrete is structurally sound, clean, dry enough, and prepared according to the product instructions. Primer is commonly required.
Yes, but only when the exact product is approved for plywood. Panel grade, thickness, fastening, primer, and minimum application depth may all matter.
Some specialty products allow OSB. Many others do not. Approval for plywood should not be assumed to include OSB.
Some products may be applied over firmly bonded, properly prepared tile. Loose or hollow tiles should be removed or repaired first.
Many products require primer. Some specialty systems may not under specific conditions. Follow the exact product data sheet.
Thickness limits vary by product. Some are intended only for thin layers, while others may be extended with aggregate or installed in deeper lifts.
Only products specifically approved for feather-edge application should be tapered to nearly zero thickness.
Drying may take a few hours or several days depending on product, depth, temperature, humidity, substrate, and floor covering.
Many cured compounds can be mechanically smoothed, but sanding or grinding may create hazardous dust. Appropriate extraction and PPE are required.
Usually not. Moisture resistance does not make the product a waterproofing membrane or vapor barrier.
Only products expressly approved for exterior use and the expected weather, moisture, and freeze-thaw conditions should be used outdoors.
Most underlayments must be covered. Use an approved exposed topping when the surface will remain visible and receive traffic.
Ordinary self-leveling compounds are generally not designed to be penetrated by flooring nails or staples. Written manufacturer approval is advisable.
No. Drywall compound is not designed as a durable, load-bearing floor patch.
It may soften very minor texture, but it cannot correct deep dips, sharp humps, loose panels, or structural defects.
Conclusion
Floor leveling compound can create a smooth, stable substrate for vinyl, laminate, carpet, tile, wood flooring, and other finishes. However, successful installation depends on choosing the right product for the substrate and application.
The first step is determining whether the floor is merely uneven or affected by structural movement, moisture, rot, settlement, or damaged framing. Those problems must be corrected before cosmetic leveling begins.
It is also essential to distinguish between a localized patching compound, a self-leveling underlayment, a wood-subfloor system, and an exposed floor topping.
Never select a product based only on the words “floor leveling compound” printed on the bag. Confirm the approved substrates, primer, thickness range, water ratio, working time, drying requirements, and compatibility with the finished flooring.
When the correct product is combined with proper preparation and careful application, floor leveling compound can provide a durable, flat foundation that supports the new floor for years.