
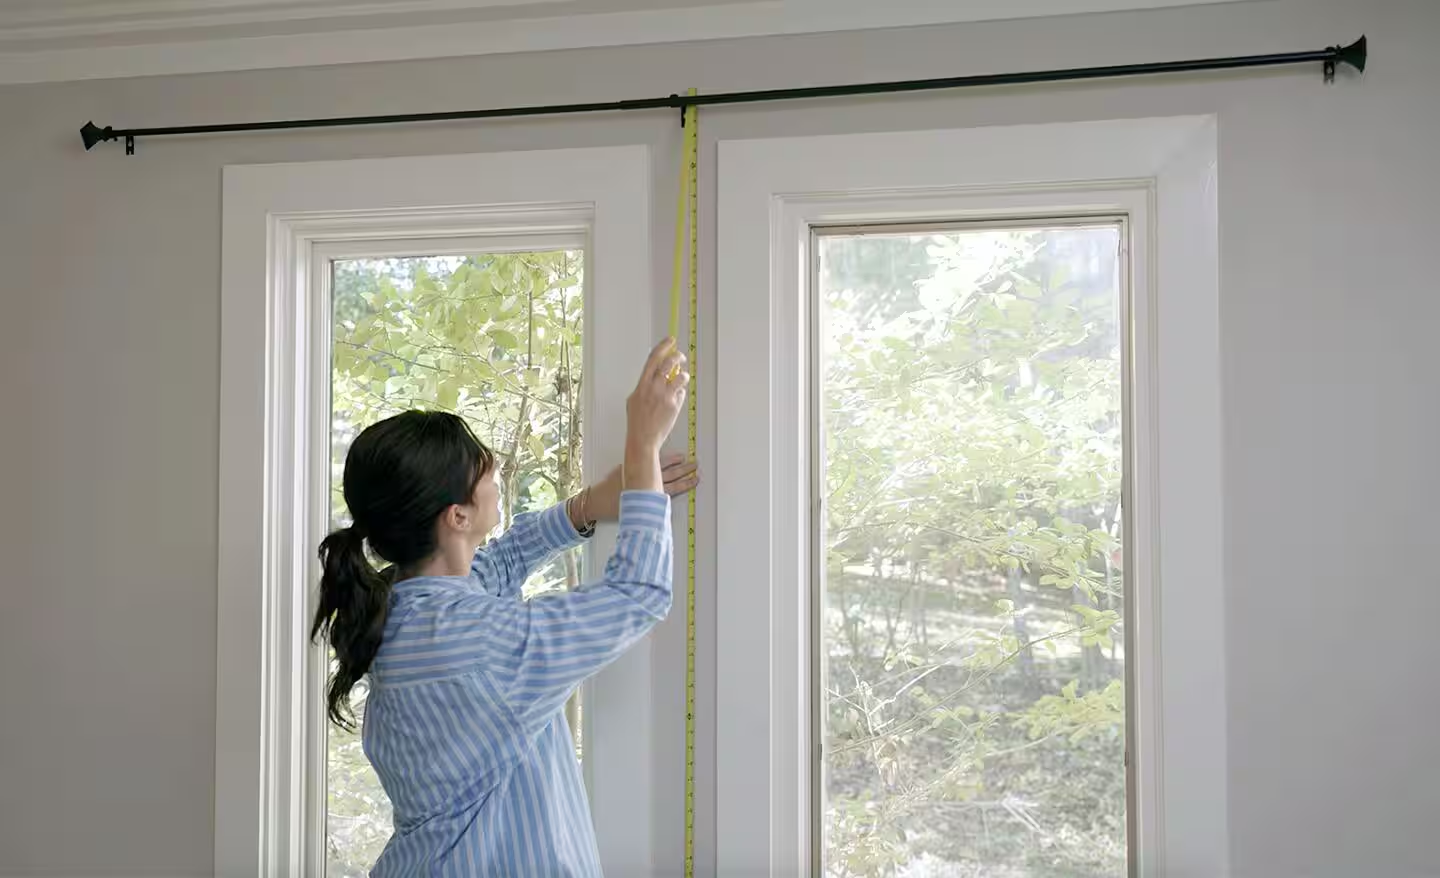

Learning how to measure for curtains correctly is the difference between panels that frame a window beautifully and curtains that look too short, too flat, or too narrow.
The process involves more than measuring the glass. You must consider where the curtain rod will sit, how far it extends beyond the window, how much fabric fullness you want, and where the curtains should finish.
The curtain heading also matters. Eyelet, pencil-pleat, tab-top, rod-pocket, and ring-hung curtains do not all hang from the same point.
This guide explains how to measure curtain width and length, calculate the number of panels you need, account for different heading styles, and choose the right size for standard, bay, double, and kitchen windows.
How to Measure for Curtains at a Glance
Use these general measurements as a starting point:
| Measurement | Recommended guideline |
| Rod extension | About 6–10 inches beyond each side |
| Standard total curtain width | 1.5–2 times the usable rod width |
| Full or luxurious curtain width | 2–2.5 times the rod width |
| Sheer curtain width | 2.5–3 times the rod width |
| Sill-length finish | ½–1 inch above the sill |
| Apron-length finish | About 6 inches below the sill |
| Floating floor length | ¼–½ inch above the floor |
| Kiss length | Barely touching the floor |
| Break length | ½–2 inches longer than floor length |
| Puddle length | 3–12 inches longer than floor length |
These are flexible design guidelines rather than fixed rules. Fabric thickness, curtain hardware, window shape, and personal style can affect the final measurements.
What You Need to Measure for Curtains
Gather the following tools before starting:
- Metal tape measure
- Pencil
- Paper or a notes app
- Stepladder
- Spirit level
- Curtain rod or track specifications
- Product size chart, when available
A rigid metal tape measure is usually more accurate than a soft fabric tape because it remains straight across the window.
Record every measurement immediately. For floor-length curtains, measure in more than one place because floors and rods are not always perfectly level.
Understand the Four Main Curtain Measurements
Before measuring, understand the four numbers you need.
1. Window width
This is the width of the window, usually measured from the outside edge of one casing to the outside edge of the other.
2. Rod or track width
This is the usable span that the curtains will cover. It normally extends beyond the window frame.
Do not include decorative finials when measuring usable rod width.
3. Total curtain width
This is the combined width of all curtain panels before they are gathered.
It should normally be wider than the rod to create folds and fullness.
4. Curtain drop
The drop is the vertical measurement from the curtain’s hanging point to its intended endpoint.
The correct starting point depends on the curtain heading and hardware.
Step 1: Choose an Inside or Outside Mount
The first decision is whether the rod or track will sit inside or outside the window recess.
Outside-mounted curtains
Outside mounting means the rod or track is installed above and beyond the window casing.
This is the most common choice for full curtains because it can:
- Make the window appear wider
- Make the ceiling look taller
- Reduce visible gaps around the window
- Allow curtains to stack beside the glass
- Let more daylight enter when the curtains are open
- Provide better privacy and light control
Outside mounting works particularly well in living rooms, bedrooms, dining rooms, and home offices.
Inside-mounted curtains
An inside mount places the curtain or rod within the window recess.
It may suit:
- Café curtains
- Tension rods
- Small kitchen windows
- Windows with limited surrounding wall space
- Lightweight decorative panels
- Deep window recesses
For an inside mount, measure between the inner edges of the recess.
Check the width at the top, middle, and bottom because the opening may not be perfectly square. Use the narrowest measurement if the hardware must fit inside the recess.
Step 2: Decide Where to Position the Curtain Rod
Rod placement affects both the appearance of the window and the curtain length you need.
A common starting point is to install the rod 4–6 inches above the top of the window frame. However, mounting it higher often creates a more elegant result.
Standard rod-height recommendations
Consider these general positions:
- Standard rooms: Mount the rod above the frame, roughly halfway to two-thirds of the distance between the window and ceiling.
- Eight-foot ceilings: Mounting close to the ceiling can make the room appear taller.
- High ceilings: Position the rod approximately 8–14 inches above the window instead of placing it at the ceiling.
- Crown molding: Install the rod directly below the molding.
- Low ceilings: Place the rod close to the ceiling or use a ceiling-mounted track.
- Cathedral ceilings: Mount the rod approximately 8–10 inches above the window rather than following the ceiling angle.
Use a level when marking the bracket positions.
Whenever possible, install the rod before ordering curtains. Measuring from actual hardware is more reliable than estimating where the rod might sit.
Step 3: Measure the Window Width
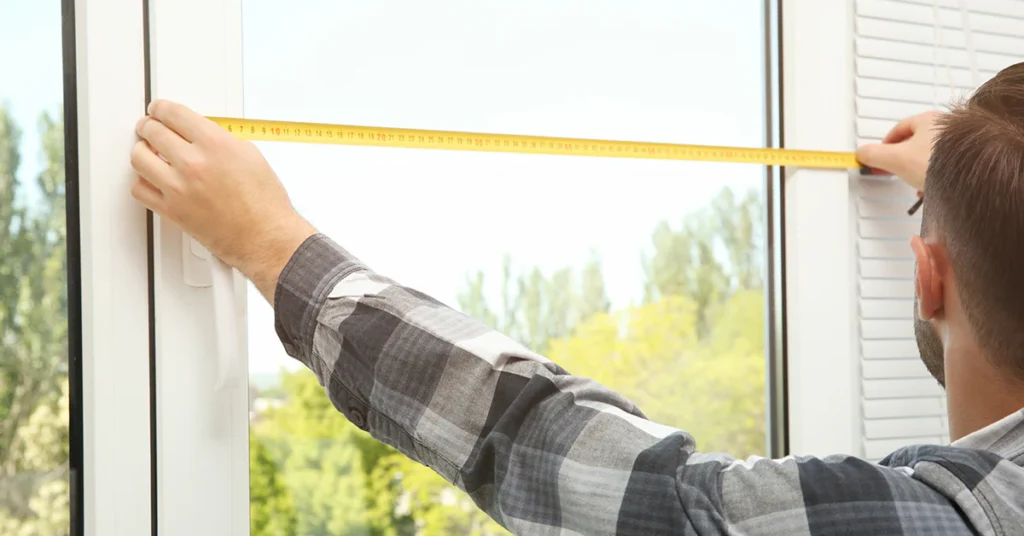
Measure from the outside edge of the left window casing to the outside edge of the right casing.
Include the trim unless you are using an inside mount.
Take the measurement in at least two places. Use the wider number when calculating an outside-mounted rod.
Do not measure only the glass
Measuring only the visible glass usually produces an undersized curtain rod and panels that do not cover the complete window.
The casing and the wall area beside the window should be included in most outside-mount installations.
Step 4: Calculate the Curtain Rod Width
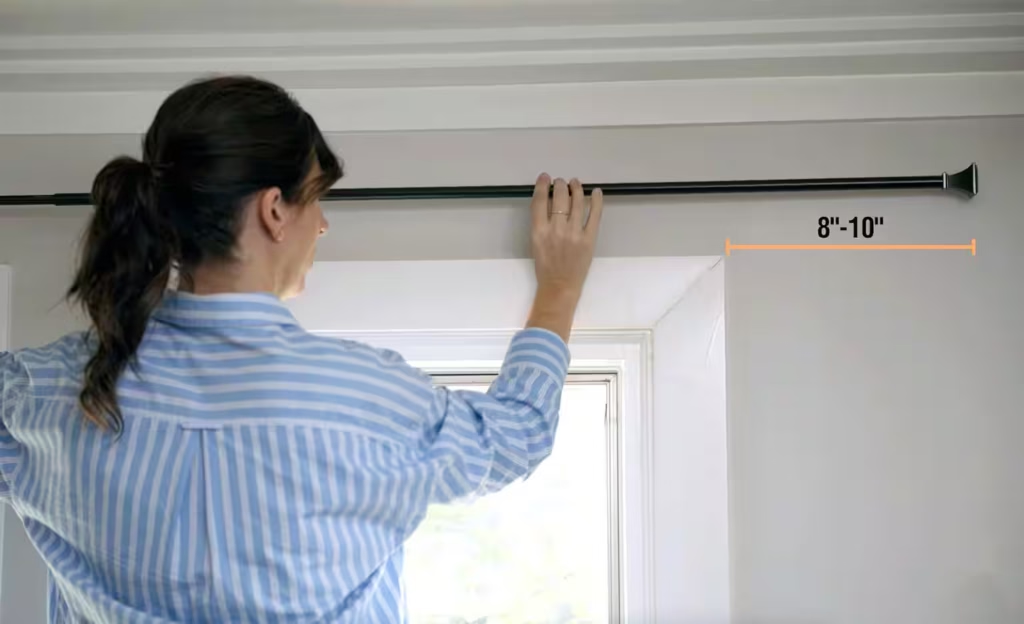
The rod should normally extend beyond the window on both sides.
Use this formula:
Rod width = window casing width + left extension + right extension
A practical recommendation is to add approximately 6–10 inches on each side when wall space allows.
The broader acceptable range is around 3–12 inches per side.
Why extend the rod beyond the window?
The extra width provides room for the open curtains to stack beside the glass.
A wider rod can:
- Make the window appear larger
- Allow more natural light into the room
- Reduce fabric covering the glass
- Improve the overall proportions
- Provide space for thick or lined curtains
Example of calculating rod width
Suppose the window casing measures 60 inches.
You plan to extend the rod 8 inches on each side:
60 + 8 + 8 = 76 inches
The recommended usable rod width is approximately 76 inches.
Do not include finials in this measurement. Finials are decorative end pieces and do not support the curtain fabric.
Step 5: Measure the Usable Rod or Track Width
If the hardware is already installed, measure the actual usable span.
Curtain rod
Measure between the inner edges of the finials or end stops.
Curtain track
Measure the complete section along which the carriers, hooks, or curtains can travel.
Bay-window rod
Measure each straight section separately unless the curtains run across one continuous curved track.
The installed rod or track width is the best measurement to use when calculating curtain fullness.
Step 6: Calculate the Correct Curtain Width
The total width of the curtain panels should be greater than the width of the rod.
Otherwise, the curtains will look flat when closed.
Use this formula:
Total curtain width = usable rod width × fullness ratio
Standard fullness
For most curtains:
Rod width × 1.5–2
A fullness ratio of 1.5 creates a cleaner, less gathered appearance.
A ratio of 2 creates fuller folds and is a reliable choice for most bedrooms, living rooms, and dining rooms.
Luxury fullness
For a richer or more formal appearance:
Rod width × 2–2.5
This works well with decorative fabrics, tall windows, and formal rooms.
Sheer-curtain fullness
Sheer or lightweight fabrics often need more fullness:
Rod width × 2.5–3
Extra material prevents sheer panels from looking sparse.
Heavy curtains
Very thick, lined, velvet, or blackout curtains may not need as much fullness as lightweight fabric because the material takes up more space when gathered.
A ratio of around 1.5–2 may be sufficient.
Curtain-Width Calculation Example
Suppose your usable curtain rod is 76 inches wide.
For twice fullness:
76 × 2 = 152 inches
You need approximately 152 inches of total curtain width.
When using two panels:
152 ÷ 2 = 76 inches per panel
Two panels approximately 76 inches wide would create twice fullness.
If the available panels are 52 inches wide:
52 × 3 = 156 inches
Three 52-inch panels would provide enough total width.
There is no rule that every window must use exactly two panels. Wide windows and sliding doors may require three, four, or more panels.
Does Curtain Width Refer to One Panel or the Pair?
Always check the packaging or online product description.
Retailers may list curtain sizes in different ways:
- Width per individual panel
- Combined width of the pair
- Width of a single-panel package
- Ungathered fabric width
- Finished gathered width
For example, a package labeled “52 inches wide” may contain one 52-inch panel rather than a pair totaling 52 inches.
UK ready-made curtain packaging often lists the width of each panel, even when the package includes two curtains.
Before buying, confirm:
- How many panels are included
- Whether the listed width is per panel
- Whether the panels are sold individually or as a pair
- Whether the stated width is before gathering
- Whether pleats or adjustable hooks affect the finished width
Step 7: Choose the Curtain Length
The correct curtain length depends on the room, window location, and desired style.
Sill-length curtains
Sill-length curtains finish approximately ½–1 inch above the windowsill.
They are practical for:
- Kitchens
- Bathrooms
- Basement windows
- Windows above counters
- Windows above sinks
- Windows near radiators
- Small informal rooms
Measure from the correct hanging point to slightly above the sill.
Measure both sides because an uneven sill is more noticeable with short curtains.
Apron-length curtains
Apron curtains extend below the sill, normally by approximately 6 inches.
They offer more coverage than sill-length panels without reaching the floor.
Apron length can work when:
- Furniture sits below the window
- A radiator blocks floor-length curtains
- The room has a casual design
- Full-length panels would be impractical
Try to align the hem with a strong architectural line rather than allowing it to end at a random height.
Floating floor-length curtains
Floating curtains end approximately ¼–½ inch above the floor.
This is one of the most practical choices because the fabric does not drag, collect as much dust, or interfere with cleaning.
Floating curtains are suitable for:
- Bedrooms
- Living rooms
- Dining rooms
- Home offices
- Frequently used curtains
Kiss-length curtains
Kiss-length curtains barely touch the floor.
Use the exact measurement from the hanging point to the floor.
This style requires accurate measuring and level hardware. Even a small difference may cause one panel to look shorter.
Break-length curtains
Break-length curtains touch the floor and bend slightly at the bottom.
Add approximately ½–2 inches to the rod-to-floor measurement.
This style creates a relaxed appearance and may help disguise a slightly uneven floor.
Puddle-length curtains
Puddled curtains extend onto the floor.
Add:
- 3–6 inches for a controlled puddle
- 6–12 inches for a dramatic puddle
- Up to 16 inches for a highly formal treatment
Puddled curtains are decorative but less practical.
They may:
- Collect dust and pet hair
- Require frequent arranging
- Interfere with vacuuming
- Create a tripping hazard
- Be difficult to open and close regularly
Use them in low-traffic rooms where appearance is more important than convenience.
Step 8: Measure the Curtain Drop
The curtain drop is measured from the true hanging point to the desired endpoint.
Measure at the:
- Left side
- Center
- Right side
Floors, ceilings, window sills, and rods can be uneven.
For floating curtains, use the shortest floor measurement to help prevent the fabric from touching.
For break or puddle styles, a slight difference is less noticeable.
Step 9: Account for the Curtain Heading
The heading is the top section of the curtain that connects to the rod or track.
Different headings change the correct starting point for the drop measurement.
How to measure for eyelet or grommet curtains
Eyelet curtains contain metal rings near the top edge.
The listed curtain length usually includes the complete fabric panel, including the material above the eyelet opening.
To measure correctly:
- Mark the planned position of the curtain pole.
- Check how far the fabric rises above the eyelet.
- Measure from the expected top edge of the curtain to the desired endpoint.
- Confirm the manufacturer’s size diagram before ordering.
Do not assume that every eyelet curtain is measured from the center or top of the pole. Product construction varies.
How to measure for tab-top curtains
Tab-top curtains hang from fabric loops.
The listed curtain length normally includes the tabs.
Measure from the top of the tabs to the desired endpoint, then confirm the product’s total finished length.
The curtain body will begin below the rod because the tabs take up part of the drop.
How to measure for rod-pocket curtains
Rod-pocket curtains slide directly onto the pole.
The listed length usually covers the entire panel, including any fabric above the rod pocket.
Check:
- The position of the pocket
- Whether there is a decorative header above it
- The full top-to-bottom panel measurement
Measure from the expected top edge of the curtain to the desired endpoint.
How to measure for pencil-pleat curtains
For pencil-pleat curtains hanging from a pole:
- Measure from the eye of the curtain ring to the desired endpoint.
For pencil-pleat curtains hanging from a track:
- Measure from the top of the track or the manufacturer’s stated hook position.
Adjustable hooks may allow small changes to the finished height.
How to measure for pinch-pleat curtains
Pinch-pleat curtains usually hang from hooks attached to rings or track carriers.
Measure from the hook or ring attachment point to the desired endpoint.
Check whether the heading is designed to sit above, below, or directly in front of the track.
How to measure for clip-ring curtains
Measure from the lower edge of the clip or ring to the intended endpoint.
The ring and clip add length between the rod and fabric, so include the actual hardware in the measurement.
Standard Ready-Made Curtain Sizes
Ready-made sizes vary by retailer and country.
Common US curtain lengths
Frequently available lengths include:
- 63 inches
- 84 inches
- 96 inches
- 108 inches
- 120 inches
Some brands also offer shorter café lengths or extra-long panels.
Common panel widths include:
- 24 inches
- 36 inches
- 48 inches
- 50 inches
- 52 inches
Do not assume that 84-inch curtains automatically fit a room with an eight-foot ceiling. Rod height and window position determine the correct length.
Common UK curtain sizes
Common individual panel widths include:
- 117 cm, approximately 46 inches
- 168 cm, approximately 66 inches
- 228 cm, approximately 90 inches
Common drops include:
- 137 cm, approximately 54 inches
- 182 cm, approximately 72 inches
- 228 cm, approximately 90 inches
- 274 cm, approximately 108 inches, from selected ranges
UK ready-made curtains are often sold as a pair, but the printed width may refer to each individual curtain.
Always read the product description carefully.
How to Measure for Curtains Without a Rod
Measuring after installing the rod is best, but you can estimate the required size beforehand.
Follow these steps:
- Measure the outside width of the window casing.
- Decide how far the rod will extend on each side.
- Add the two extensions to the window width.
- Mark the planned rod height.
- Measure from that height to the desired endpoint.
- Adjust for the curtain heading.
- Multiply the estimated rod width by the desired fullness ratio.
Example
The window casing is 60 inches wide.
You plan to add 8 inches on each side:
60 + 8 + 8 = 76 inches of rod width
For twice fullness:
76 × 2 = 152 inches of total curtain width
You could use:
- Two 76-inch panels
- Three 52-inch panels
- Four 40-inch panels
- Another combination totaling approximately 152 inches
How to Measure for Bay-Window Curtains
Bay windows require separate measurements because the wall changes direction.
With separate rods
Measure each window section independently.
Record:
- Width of each section
- Distance between corners
- Rod-extension space
- Curtain-stack space
- Length from each rod section to the floor
With a continuous track
Measure the full path the curtains will travel along the curved or angled track.
Do not use a straight wall-to-wall measurement if the track follows the shape of the bay.
Thick curtains need more stacking room than sheers, so consider where the open fabric will sit.
How to Measure for Double Windows
Two windows close together can be treated as one wide opening or as separate windows.
One continuous rod
Measure from the outside edge of the first casing to the outside edge of the second casing.
Add the desired rod extension to both outer sides.
A single rod often creates a cleaner and more cohesive appearance.
Separate rods
Use separate hardware when:
- The windows are far apart
- Furniture sits between them
- Each window needs independent light control
- Wall construction prevents one long rod
- The windows are different sizes
Calculate the curtain fullness for each rod separately.
How to Measure Curtains for Sliding Glass Doors
Sliding doors need enough fabric to cover a large span while still opening easily.
Measure:
- The complete door-frame width
- The desired rod extension
- The usable rod or track width
- The rod-to-floor drop
- The stacking area on the opening side
Use approximately 1.5–2 times fullness for most door curtains.
Avoid excessive puddling because the fabric may catch underfoot or interfere with the door.
A ceiling-mounted track can create a clean, modern appearance and make the room seem taller.
How to Measure Kitchen Curtains
Kitchen curtains often need to fit around counters, sinks, cabinets, and appliances.
Sill-length or café curtains are usually the most practical options.
Measure from the curtain’s hanging point to:
- ½–1 inch above the sill
- The center of the window for café curtains
- A safe point above the counter or sink
Keep fabric away from:
- Stove burners
- Open flames
- Wet work surfaces
- Frequently used appliances
Washable materials are usually easier to maintain in kitchens.
How to Measure for Blackout Curtains
Blackout curtains need enough width and overlap to reduce light gaps.
For better coverage:
- Use an outside mount
- Extend the rod beyond the window
- Mount it above the frame
- Use at least twice fullness where practical
- Choose lined or wraparound hardware
- Allow the panels to overlap in the center
- Consider floor-length panels
The fabric should extend past the casing on all sides.
A standard decorative curtain measurement may not provide complete darkness because light can still enter around the edges.
How to Measure for Sheer Curtains
Sheer fabric looks best with additional fullness.
Use approximately:
Rod width × 2.5–3
Sheers can be:
- Used alone
- Layered under blackout curtains
- Combined with decorative side panels
- Installed on a double rod
- Hung from a separate track
When layering curtains, measure each rod or track independently.
How Many Curtain Panels Do You Need?
Use this formula:
Number of panels = total required curtain width ÷ width of one panel
Round up to the next whole panel.
Example
You need 152 inches of total fabric.
Each panel is 50 inches wide:
152 ÷ 50 = 3.04
Round up to four panels.
Four panels provide:
4 × 50 = 200 inches
That creates extra fullness, which is usually preferable to panels that are too narrow.
Should Curtains Touch the Floor?
Curtains do not have to touch the floor.
The best choice depends on the room and how the curtains will be used.
Choose:
- Float length for easy cleaning and daily use
- Kiss length for a precise tailored look
- Break length for a relaxed style
- Puddle length for formal decorative rooms
- Sill length for kitchens, bathrooms, and windows above counters
For most homes, floating approximately ¼–½ inch above the floor is the easiest option to maintain.
Should You Round Curtain Measurements Up or Down?
When choosing curtain width, round up.
More fullness generally looks better than too little fabric.
When choosing between two ready-made lengths, the longer panel is often the safer option because it can be:
- Hemmed
- Raised slightly by moving the rod
- Adjusted with hooks
- Shortened with bonding tape
A curtain that is much too short is harder to correct.
Common Mistakes When Measuring for Curtains
Measuring only the glass
Most outside-mounted curtains cover the trim and surrounding wall area.
Forgetting rod extension
A rod matching the exact window width leaves little room for the curtains to stack.
Using window width as total curtain width
Curtains need extra material to create folds.
Including finials in the rod width
Measure only the usable rod section.
Confusing rod width with panel fullness
First calculate rod width. Then multiply it by the desired fullness ratio.
Assuming every package contains two panels
Many curtain products are sold as single panels.
Misreading panel width
The listed width may apply to one panel rather than the whole pair.
Ignoring the heading style
Eyelets, tabs, rings, hooks, and rod pockets all affect where the curtain begins.
Measuring length before deciding rod height
Changing the rod position changes the required curtain drop.
Measuring the floor in one place
Uneven floors can make one panel drag while another floats.
Choosing curtains that are too short
Panels that end several inches above the floor often look accidental unless they are intentionally sill or apron length.
Forgetting stack-back space
Thick curtains need enough wall space beside the window when open.
Complete Curtain Measurement Checklist
Before ordering, confirm that you have:
- Measured the complete window casing
- Chosen an inside or outside mount
- Selected the rod or track height
- Calculated the left and right rod extension
- Measured the usable rod width without finials
- Chosen a fullness ratio
- Calculated the total curtain width
- Checked whether sizes are per panel or per pair
- Confirmed the number of panels included
- Chosen a sill, apron, float, kiss, break, or puddle finish
- Measured the drop on the left, center, and right
- Accounted for the curtain heading
- Checked standard ready-made sizes
- Allowed enough room for the curtains to stack
- Rounded up when between panel widths
- Confirmed all figures before ordering
Frequently Asked Questions About How to Measure for Curtains
Measure the window casing, choose the rod position, and calculate the usable rod width. Multiply that width by approximately 1.5–2 to determine total curtain width. Measure the length from the curtain’s true hanging point to the desired sill or floor position.
Use the installed rod or track width whenever possible. The rod normally extends beyond the window, so using only the glass or casing width may result in panels that are too narrow.
The rod commonly extends 6–10 inches beyond each side. The combined curtain fabric should then equal approximately 1.5–2 times the usable rod width.
A common recommendation is 6–10 inches per side. The broader usable range is approximately 3–12 inches, depending on wall space and fabric thickness.
Use 1.5 times fullness for a simpler look, 2 times for standard fullness, 2–2.5 times for a luxurious appearance, and 2.5–3 times for sheer fabric.
Divide the total required curtain width by the width of one panel, then round up. Standard windows often use two panels, while wide windows and doors may need three or more.
No. Measure only the usable rod span between the decorative finials.
They can float slightly above the floor, barely touch it, break gently, or puddle. Floating ¼–½ inch above the floor is practical for most homes.
Check the manufacturer’s finished-length diagram. The listed drop commonly includes the complete panel from the top fabric edge, including the material above the eyelet opening.
For a pole, measure from the eye of the curtain ring. For a track, measure from the top of the track or the recommended hook position to the desired endpoint.
Slightly longer curtains are usually preferable because they can be hemmed or adjusted. Curtains that are noticeably too short are more difficult to fix.
Yes, but the measurement is an estimate. Add the desired extension to both sides of the window, choose a mounting height, and calculate the drop from that planned point. Measuring from installed hardware is more accurate.
Conclusion
Understanding how to measure for curtains requires four main steps: measure the window, determine the rod width, calculate fabric fullness, and measure the finished drop.
For most windows, extend the rod approximately 6–10 inches beyond each side of the frame. Calculate total curtain width at around 1.5–2 times the usable rod width, using more fullness for sheers or a luxurious appearance.
Measure the curtain length from the correct hanging point and account for the heading style. Check whether the listed product width refers to one panel or a pair before buying.
Accurate measurements will help your curtains hang evenly, maintain attractive folds, cover the complete window, and finish at an intentional height.