
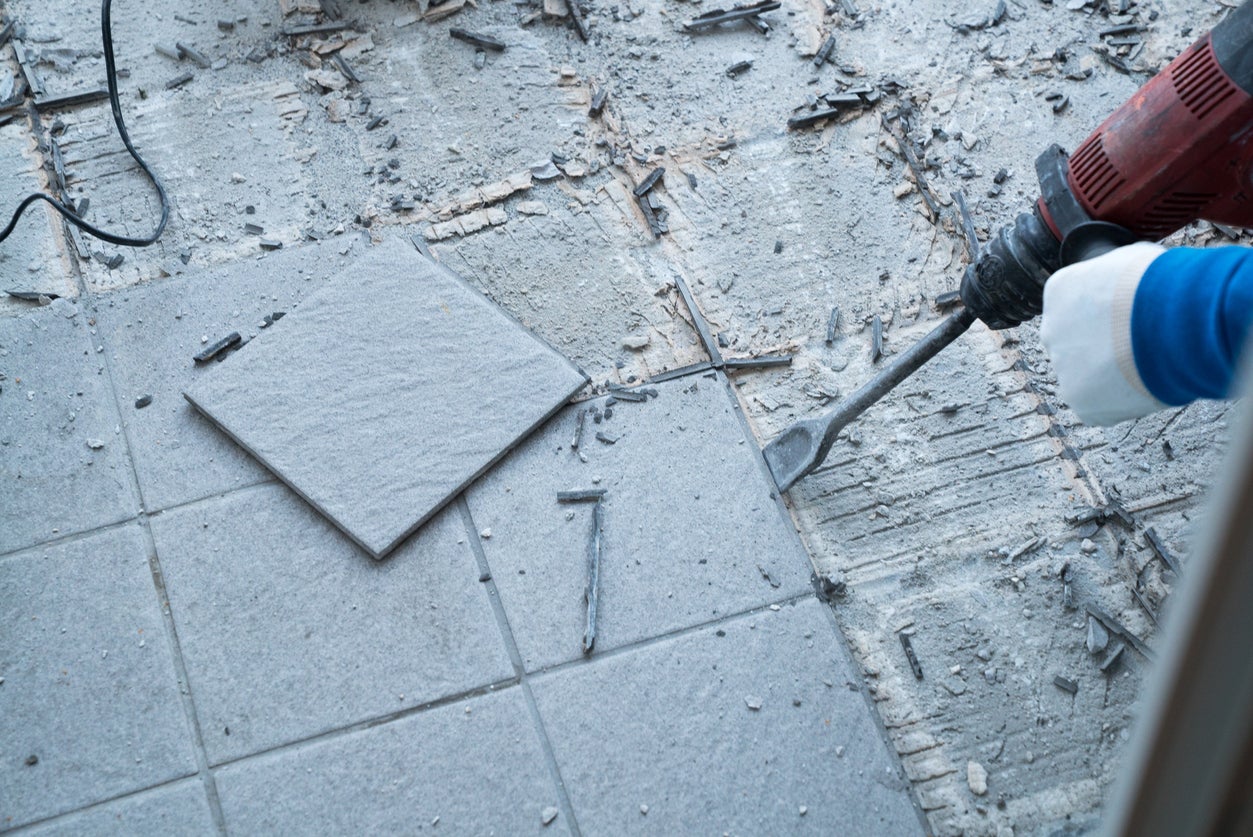

How to remove tile floor materials safely often depends on the tile type, adhesive, and subfloor beneath it. Although the job can be dusty and tiring, careful preparation makes it manageable. This guide explains the complete process, from breaking the first tile to preparing the surface for new flooring.
What to Know Before Removing Tile Flooring?
Before learning how to remove floor tile, inspect the room and understand how the floor was installed. Some tiles sit directly on concrete, while others attach to plywood or cement backer board. The installation method affects the tools, time, and effort required.
Also, check whether the tile runs beneath cabinets, appliances, or permanent fixtures. Plan where debris will go and how it will leave the house. Tile fragments are sharp, heavy, and difficult to carry in large loads.
Good planning prevents expensive surprises. These broader renovation tips can also help with budgeting, protecting nearby surfaces, and organizing the project before demolition begins.
Benefits of Removing Old Tile
Removing an old tile floor creates a clean foundation for a new design. Cracked, stained, uneven, or dated tiles can make an otherwise attractive room feel worn out. Floor tile removal also exposes hidden problems such as moisture damage, loose backer board, rotten plywood, and cracks in concrete.
A bare subfloor provides more flooring choices. Luxury vinyl, laminate, engineered wood, sheet vinyl, or new tile can be installed once the surface is properly repaired.
Removing floor tiles may also solve height problems near doorways and transitions. Installing flooring over existing tile can raise the floor too much, causing doors to scrape and creating awkward edges between rooms.
Can You Remove Tile Flooring Yourself?
Many people can complete DIY tile removal with patience, basic tools, and proper safety equipment. However, the job involves noise, dust, sharp fragments, and heavy debris. The easiest projects involve small rooms, loose ceramic tiles, and solid concrete subfloors.
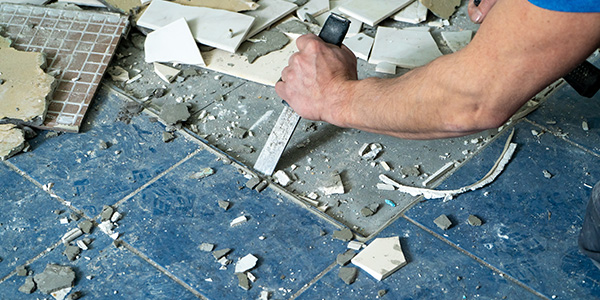
Large areas, natural stone, thick mortar beds, damaged subfloors, or possible asbestos may require professional help. Consider physical ability, available time, disposal options, and the cost of renting equipment before deciding.
- When DIY Removal Makes Sense
DIY removal makes sense when the room is small, the tile lifts without extreme effort, and the subfloor appears stable. It is also practical when the schedule is flexible and there is a safe place to store or dispose of debris.
- When to Hire a Professional
Hire a professional when the tile covers a large area, sits in a thick mortar bed, or surrounds plumbing and electrical systems. Professional help may also be useful when tile removal forms part of a larger bathroom remodel involving structural, plumbing, or waterproofing work.
Tools and Materials You Will Need
The correct tile removal tools make the project faster and reduce damage. Common supplies include a pry bar, hammer, masonry chisel, utility knife, floor scraper, shovel, broom, shop vacuum, buckets, and heavy-duty debris bags.
For difficult floors, consider renting an electric tile removal tool, demolition hammer, or walk-behind tile removal machine. Keep plastic sheeting, painter’s tape, cardboard, and drop cloths nearby to protect the rest of the home.
- Essential Hand Tools
Useful hand tools include a cold chisel, pry bar, club hammer, locking pliers, utility knife, and flat floor scraper. A long-handled tile scraper gives better leverage and allows more work from a standing position.
- Power Tools for Faster Removal
A rotary hammer or demolition hammer fitted with a wide chisel attachment can loosen tile and mortar quickly. For a large concrete slab, a rented floor tile removal machine may save hours of exhausting manual labor.
- Safety Equipment
Wear safety glasses or a full face shield, durable work gloves, long sleeves, long pants, hearing protection, and sturdy boots. Use a properly fitted dust mask or respirator suitable for fine construction dust.
How to Prepare the Room?
Preparation is a major part of learning how to remove tile flooring successfully. A clear, sealed, and protected work area reduces cleanup and prevents damage. Remove everything possible before breaking tile.

Create a direct path from the room to the disposal area. Cover floors along that path with protective material. Place tools where they can be reached without walking across broken tile, and keep children and pets away from the work zone.
- Get Permission if You Rent
Renters should never remove permanent flooring without written approval from the landlord or property manager. The agreement should explain who will pay for demolition, repairs, disposal, and replacement flooring. Verbal approval may not protect against later charges.
- Remove Furniture and Appliances
Take out furniture, rugs, freestanding shelves, and small appliances. Disconnect and move larger appliances only when it can be done safely. Use an appliance dolly instead of dragging heavy items across the floor.
Protect Doors, Walls, and Cabinets
Cover cabinet bases, lower walls, doors, and nearby fixtures with cardboard or hardboard. Tape plastic sheeting across open doorways. Tile fragments can fly like small pieces of glass, so lightweight fabric alone may not provide enough protection.
- Turn Off Nearby Utilities
Turn off electricity to outlets or wiring near the work area when demolition could expose them. Shut off water before moving toilets, sinks, dishwashers, or refrigerators with water lines. Confirm that each utility is off before starting.
- Improve Ventilation and Dust Control
Open exterior windows when conditions allow, but keep doors leading into the home sealed. Place a fan in a window so it blows dusty air outside. Use a shop vacuum with a fine-dust filter during the project instead of waiting until the end.
How to Remove Tile Floor Step by Step?
The best way to remove floor tile is to work in an organized sequence. Start at an exposed edge or damaged tile, create enough space for a scraper, and then move across the room in small sections.
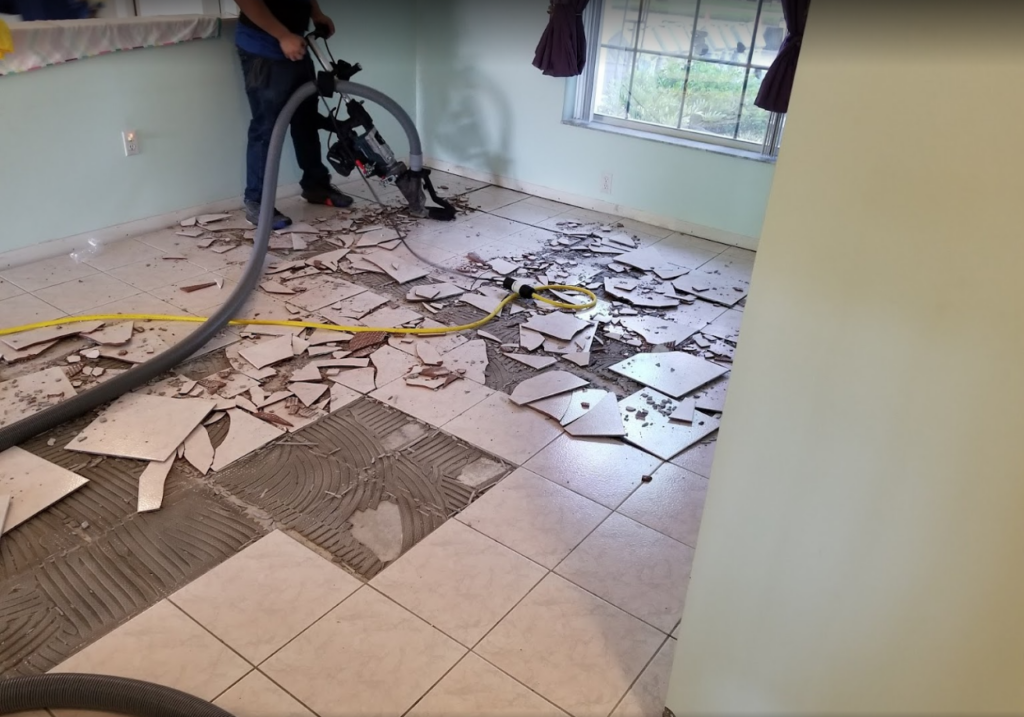
Do not attack the middle of the floor without a plan. A controlled starting point gives tools room to slide beneath the tiles and reduces unnecessary damage to the subfloor.
- Remove Baseboards and Floor Trim
Score along the painted or caulked edge of each baseboard with a utility knife. Slide a thin pry bar behind the trim and pull gently near each nail. Label reusable pieces so they return to the correct wall later.
- Find a Starting Point
Look for a loose, cracked, hollow-sounding, or partially exposed tile. Doorways, floor vents, and transitions are often good starting points. When no edge is available, choose a tile near the center of an open area.
- Break the First Tile
Cover the first tile with a towel to contain fragments. Tap the center with a hammer and chisel until it cracks. Remove the broken pieces carefully, starting in the middle and working toward the edges.
Avoid striking too deeply. The goal is to break the tile rather than punch through the backer board, plywood, pipes, heating cables, or concrete below it.
- Lift and Remove the Remaining Tiles
Once an opening exists, slide a chisel, pry bar, or tile scraper beneath the next tile. Hold the tool at a low angle and tap it forward. Many tiles will lift in pieces, although weakly bonded tiles may come up whole.
Continue removing floor tiles in rows. Clear loose fragments regularly so the work area remains stable and visible. Small sections are easier to control than a room covered in sharp debris.
- Remove Mortar or Tile Adhesive
After the tiles are gone, scrape away raised mortar, thinset, or glue. A manual floor scraper works for light residue. A demolition hammer with a scraping blade works better for hard ridges across a concrete surface.
Do not aim for perfection immediately. First remove the thickest material. Then make a second pass to flatten small ridges and stubborn patches.
- Pull Out Nails, Screws, and Backer Board
Some installations use cement backer board attached with screws or roofing nails. Remove visible fasteners with a drill, pry bar, or locking pliers. Backer board may break into sections, so lift it slowly and control the fragments.
When the backer board is strongly bonded to plywood, replacing both layers may be safer than forcing them apart and leaving a badly damaged surface.
- Clean and Inspect the Subfloor
Sweep and vacuum the exposed floor. Inspect it under strong lighting. Look for loose panels, cracks, swollen plywood, mold, water stains, protruding fasteners, soft areas, and deep gouges.
Mark each problem with chalk or painter’s tape. Repairs are easier to plan when every damaged area remains visible after the initial cleanup.
How to Remove Different Types of Tile?
The process changes slightly depending on the material. Ceramic breaks more easily than porcelain, while natural stone may be much heavier. Vinyl tiles usually bend or peel rather than shatter.
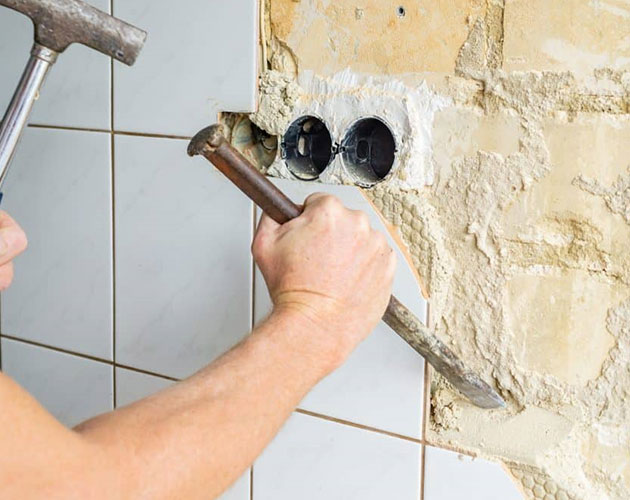
Identifying the material helps determine the best tool for removing floor tile. It also improves safety because each material creates different debris and dust.
- Ceramic Tile
To learn how to remove ceramic tile, begin with a hammer and masonry chisel. Ceramic is relatively brittle, so it often cracks into manageable pieces. During ceramic tile removal, keep the chisel low to avoid digging into the surface below.
- Porcelain Tile
Porcelain is harder, denser, and often more difficult to break than ceramic. Porcelain tile removal may require a heavier hammer or powered chisel. Wear full eye protection because dense porcelain can produce sharp, fast-moving fragments.
- Natural Stone Tile
Stone tiles are thick and heavy. Marble, slate, granite, and travertine may break unpredictably, while large pieces can be difficult to lift. Use smaller debris containers and avoid carrying more weight than can be handled safely.
- Vinyl and Peel-and-Stick Tile
When learning how to remove vinyl floor tiles, start by lifting a corner with a scraper. Gentle heat may soften some adhesives, although overheating can release unpleasant fumes or damage the subfloor.
Old adhesive should be treated cautiously, especially when the flooring’s age and contents are unknown. For information about this material and possible replacement options, see this guide to peel-and-stick tile.
- Mosaic Tile
Mosaic tiles attach to mesh sheets, so groups may lift together once the scraper reaches beneath them. However, small pieces can scatter easily. Work slowly, vacuum frequently, and use rigid containers instead of thin bags that sharp fragments may puncture.
How to Remove Tile from Different Subfloors?
The method for how to take up floor tiles must protect the supporting surface. Concrete tolerates more scraping force than plywood. Cement board often gets removed with the tile because separating the layers can be slow and destructive.
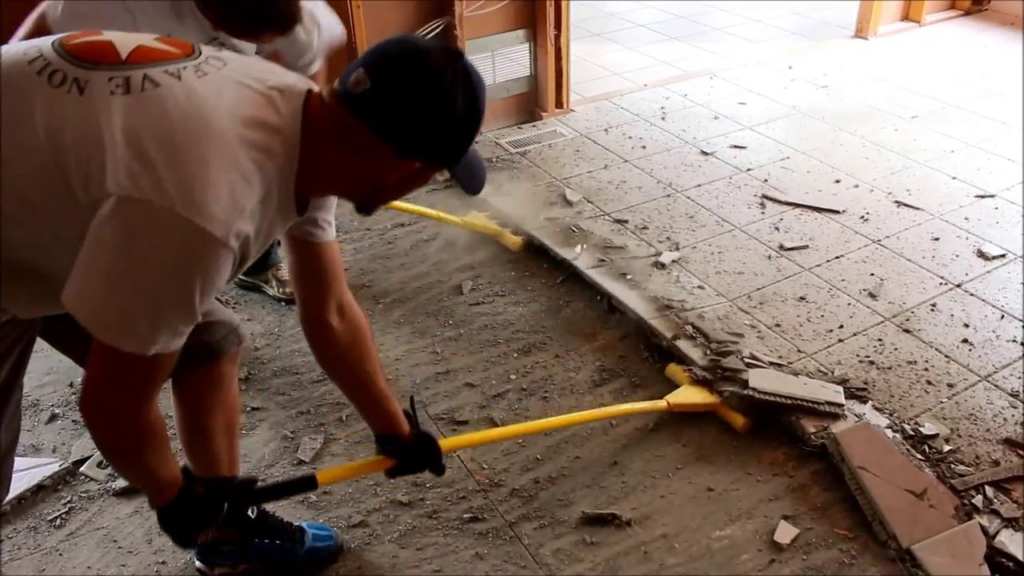
Before applying heavy force, identify the subfloor through a floor vent, doorway edge, plumbing opening, or removed tile.
- Concrete Subfloor
To learn how to remove tile from concrete, use a floor scraper or powered chisel at a shallow angle. Concrete handles impact well, but aggressive digging can still create chips and low spots.
Tile removal from a concrete slab often takes longer because thinset bonds firmly to the rough surface.
- Plywood Subfloor
When learning how to remove tile from plywood, avoid driving a chisel downward. Plywood can splinter, peel, or develop deep gouges. Use hand tools first and consider removing the underlayment as a full layer when it cannot be cleaned without major damage.
- Cement Backer Board
Cement backer board is commonly installed beneath tile over a wood structure. Rather than removing every tile and thinset ridge separately, it may be faster to cut the board into controlled sections and lift the tile, mortar, and board together.
How to Remove Thinset and Adhesive?
Knowing how to remove tile adhesive is just as important as lifting the tiles. New flooring needs a flat, clean, and stable surface. Raised ridges can cause vinyl planks to flex, laminate joints to separate, and new tiles to sit unevenly.
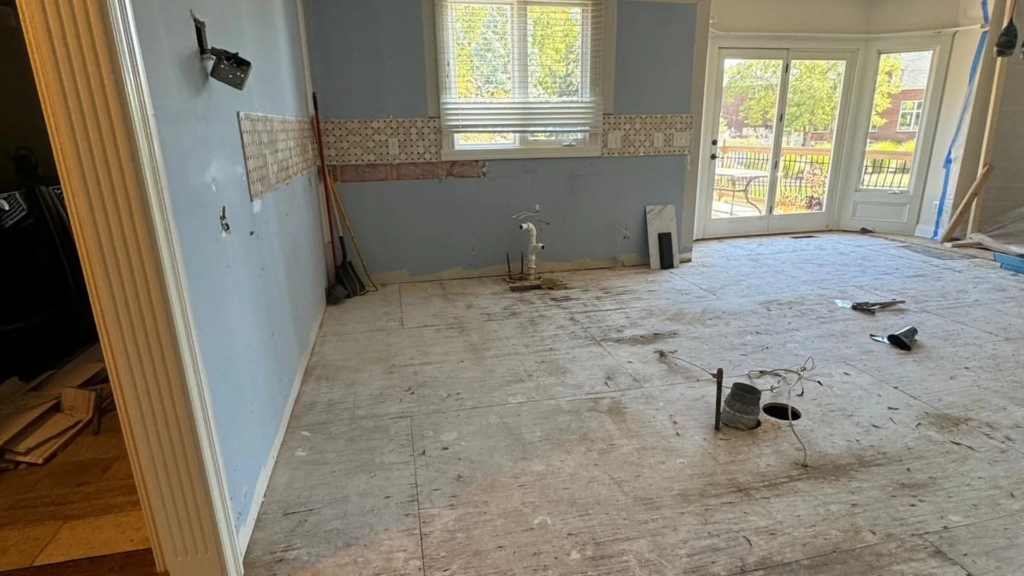
Choose the least aggressive method that works. Start with scraping, then move to powered equipment only when needed.
- Using a Floor Scraper
A sharp floor scraper for tile removal works well on loose mortar and soft adhesive. Push the blade beneath the material at a low angle. Sharpen or replace dull blades because they require more force and can skip across the floor.
- Using a Hammer Drill
A rotary hammer in chisel-only mode can remove thinset from concrete floor surfaces quickly. Fit it with a wide scaling blade and guide it almost parallel to the floor.
Do not use excessive downward pressure. Let the tool’s vibration break the bond.
- Softening Adhesive Safely
Some modern adhesives soften with warm water or a manufacturer-approved remover. Test a small area first. Never mix chemicals or use solvents in an enclosed room.
Unknown black adhesive may require professional testing before scraping, sanding, heating, or applying liquid products.
- Smoothing the Surface
After removing the main residue, pass a straightedge over the floor to find high and low areas. Scrape high spots and repair low spots with a compatible patching compound. The goal is a flat surface rather than a perfectly polished one.
How to Avoid Damaging the Subfloor?
Learning how to remove tile without damaging subfloor materials requires patience. Most damage occurs when a tool points too steeply, the worker rushes, or hidden utilities are ignored.
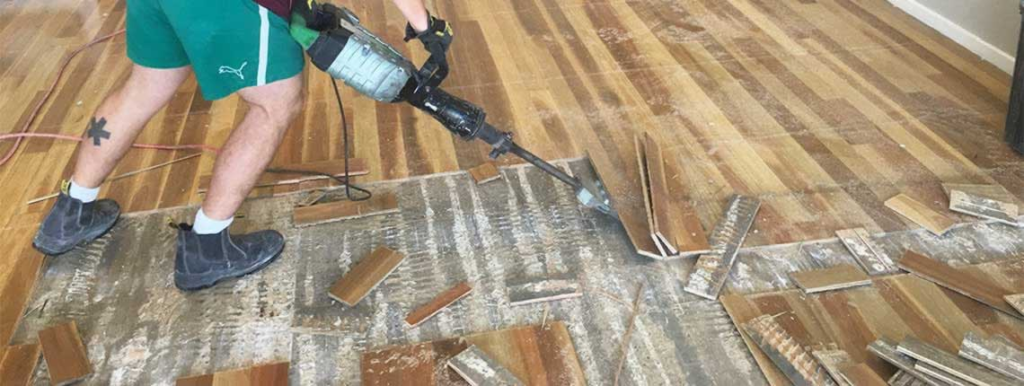
No method guarantees a flawless surface. However, careful angles, small sections, and early repairs can prevent minor marks from becoming expensive structural problems.
- Use the Right Tool Angle
Keep chisels and scraper blades nearly parallel to the floor. A steep angle directs force downward, like a shovel digging into soil. A low angle directs force beneath the tile and separates the layers more cleanly.
- Work in Small Sections
Clear an area of several tiles before moving forward. Small sections make it easier to see the subfloor and control the tool. They also prevent loose debris from hiding cracks, fasteners, vents, and plumbing openings.
- Watch for Pipes and Wiring
Be especially careful near toilets, sinks, islands, floor outlets, heating vents, and radiant floor systems. Review building plans when available. Stop immediately when metal, tubing, wires, unusual resistance, or unexpected openings appear beneath the tile.
- Repair Minor Damage Early
Fill small concrete chips with a compatible repair product. Secure loose plywood with suitable screws and replace soft or swollen sections. Fixing damage early prevents it from spreading while tools, debris, and heavy foot traffic move across the room.
Tile Removal Safety Tips
Tile removal safety should never be treated as optional. Broken tile can cut skin, fine dust can irritate lungs, and powered tools can damage hearing. A few minutes spent putting on protective equipment may prevent an injury that lasts far longer than the renovation.
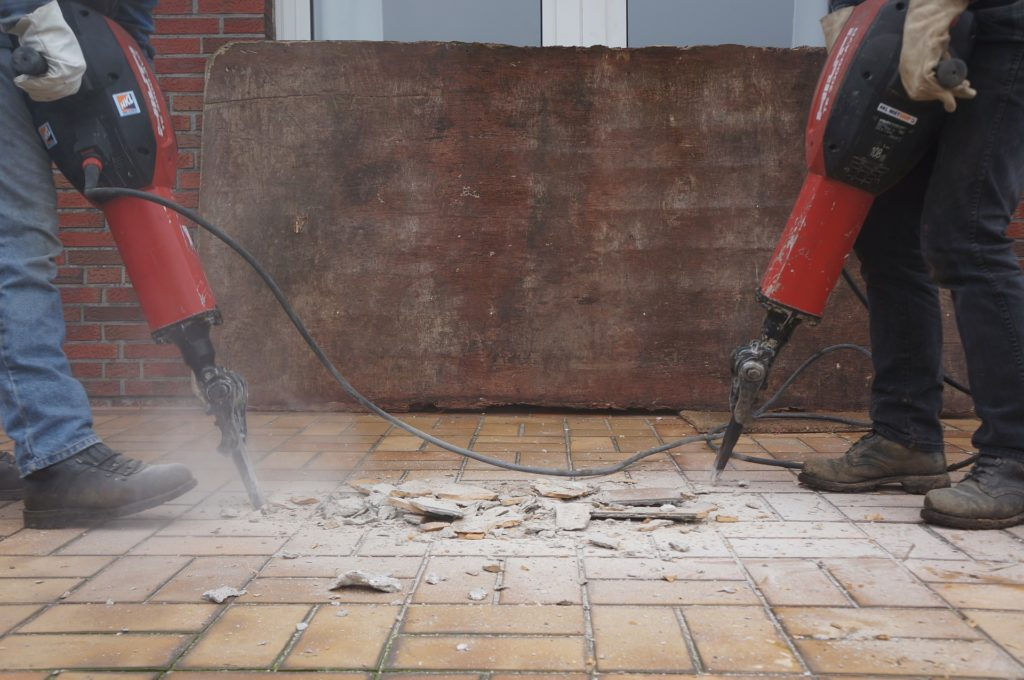
Keep a first-aid kit nearby and avoid working alone during difficult demolition.
- Protect Your Eyes, Hands, and Lungs
Wear sealed safety glasses, thick gloves, sturdy footwear, long clothing, and respiratory protection. Ordinary glasses do not provide side protection. Replace damaged gloves and clogged respirator filters rather than continuing with equipment that no longer works properly.
- Control Dust and Flying Debris
Cover the tile before making the first strike and keep the work zone sealed. Vacuum dust as it forms. Avoid dry sweeping fine powder because it sends particles back into the air and spreads them through nearby rooms.
- Lift Heavy Materials Safely
Tile, mortar, and cement board become extremely heavy in large containers. Use small buckets, bend at the knees, keep the load close, and make several trips. A hand truck or rolling cart can reduce strain during disposal.
- Check Older Flooring for Asbestos
Some older vinyl tiles, backing materials, mastics, and flooring layers may contain asbestos. Appearance alone cannot confirm whether asbestos is present. When the material is old or unknown, stop work and arrange proper testing before sanding, grinding, breaking, or scraping it.
How Much Does Tile Floor Removal Cost?
Floor tile removal cost depends on room size, tile type, installation method, location, accessibility, and subfloor condition. A lightly bonded ceramic floor costs less to remove than stone set in a thick mortar bed.
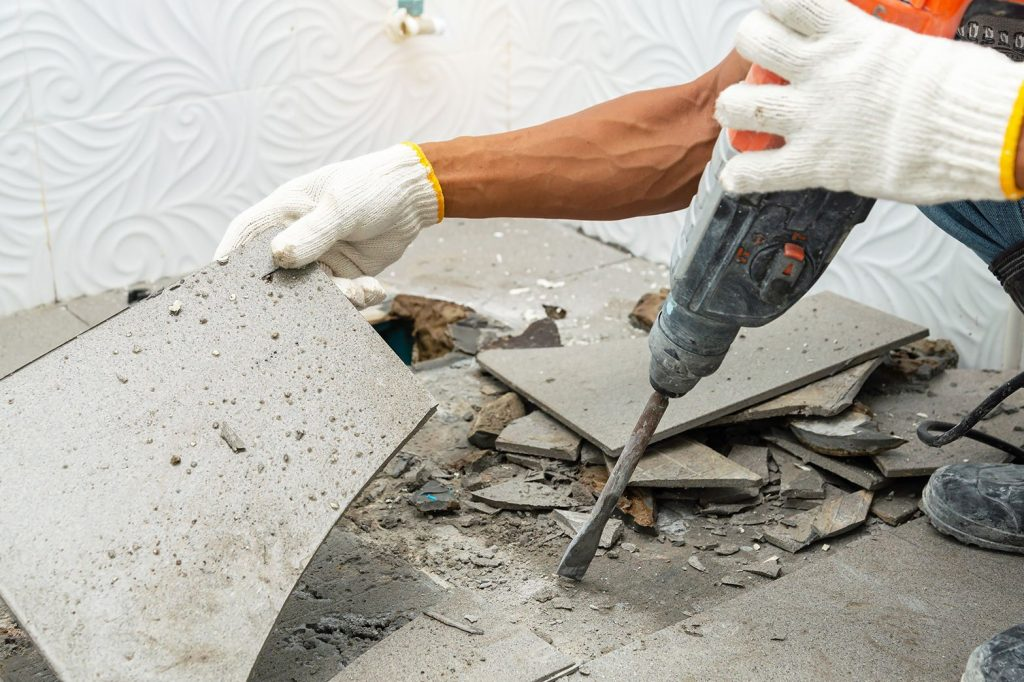
Budget for tools, equipment rental, protective supplies, disposal, repairs, and replacement flooring. Unexpected subfloor damage can add more to the project than the demolition itself.
- DIY Tool and Supply Costs
DIY tile removal cost may include hand tools, blades, respirator filters, plastic sheeting, buckets, and shop-vacuum supplies. Renting an electric tile removal tool or demolition hammer adds to the total but may reduce labor and physical strain.
- Professional Removal Costs
Professional tile removal costs are commonly calculated by square foot or as a complete project price. Rates vary widely because contractors consider tile hardness, mortar thickness, stairs, room layout, dust-control requirements, and whether the subfloor must be repaired.
- Disposal and Repair Costs
Disposal may involve landfill charges, hauling fees, a rented dumpster, or a contractor’s debris fee. Also allow money for floor patch, plywood replacement, fasteners, moisture repairs, and leveling products after the old material is removed.
- Ways to Save Money
Save money by clearing furniture, removing baseboards, creating an easy debris path, and handling final cleaning. Compare equipment rental periods carefully. A powerful machine may cost more per day but finish the work faster than several days of manual scraping.
How Long Does Tile Removal Take?
The timeline depends on tile size, bond strength, room shape, tools, experience, and cleanup requirements. A loose tile floor can disappear quickly, while a firmly bonded installation may progress only a few square feet at a time.
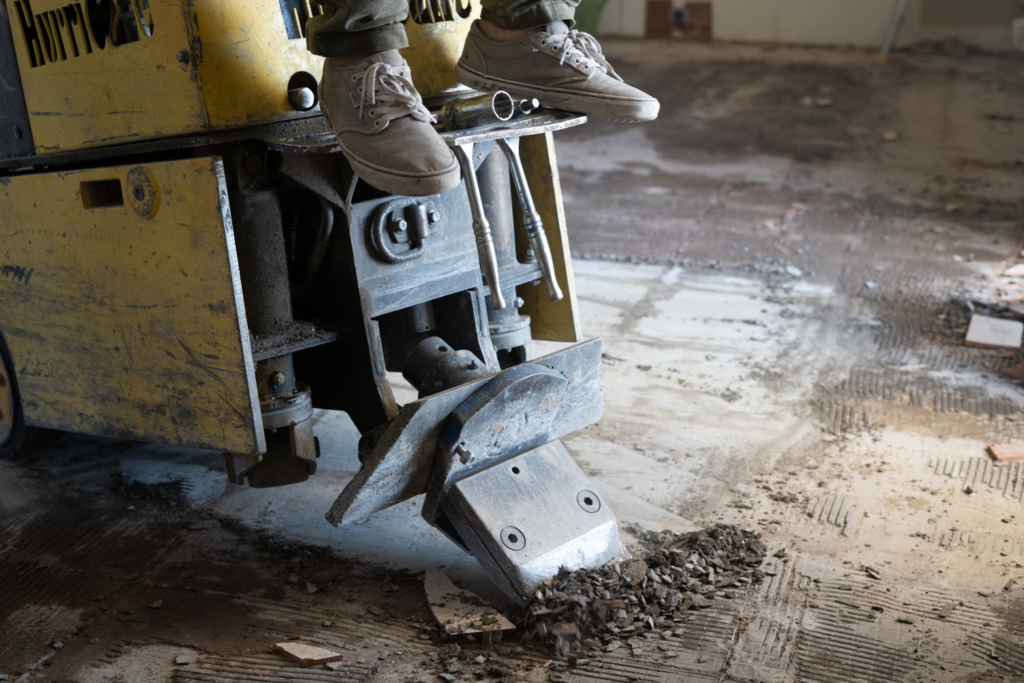
Always include preparation, adhesive removal, disposal, cleaning, inspection, and repairs when estimating the schedule.
- Small Bathrooms
A small bathroom may take a full day or weekend once fixture removal, tight corners, disposal, and cleanup are included. Working around a toilet flange, vanity, plumbing lines, and door trim often slows progress more than the room’s size suggests.
- Kitchens and Medium Rooms
A kitchen or medium room may require several working days, especially when appliances and cabinets limit access. Thick thinset, large porcelain tiles, and difficult disposal routes can extend the timeline.
- Large or Difficult Floors
Large open rooms may be faster per square foot with a tile removal machine. However, stone tile, mortar beds, multiple flooring layers, stairs, radiant heating, and serious subfloor repairs can turn the project into a longer renovation.
How to Dispose of Old Tile?
Old tile cannot usually be placed in ordinary household bins in large amounts. It is heavy enough to damage containers, collection trucks, and lifting equipment. Separate sharp fragments from general trash and use strong, manageable containers.
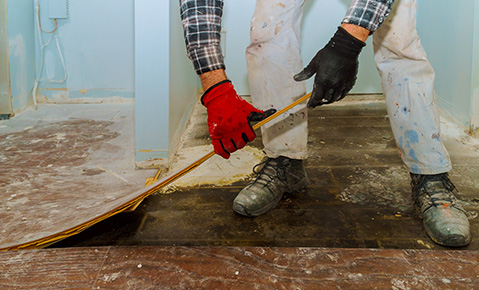
Plan disposal before demolition so debris does not block doors, hallways, or work areas.
- Local Waste Rules
Contact the local waste authority or disposal facility and ask about construction debris, weight limits, accepted materials, and fees. Rules vary by area. Some locations require tile and concrete to be separated from wood, plastic, metal, and general waste.
- Dumpster and Hauling Options
A small dumpster may suit a large project, while a junk-removal service can handle loading and transport. Confirm weight allowances before booking. Tile and mortar are dense, so a small container may reach its weight limit before it looks full.
- Reusing or Recycling Tile
Whole tiles may be reused for repairs, garden edging, craft projects, coasters, or small decorative surfaces. Some recycling facilities accept clean ceramic, stone, or concrete materials for crushing. Call first because ordinary curbside recycling programs rarely accept demolition tile.
How to Prepare the Floor for New Flooring?
After floor tile removal, the subfloor must be clean, dry, flat, solid, and suitable for the chosen material. Do not rush straight into installation. New flooring cannot hide movement, moisture, loose panels, or severe unevenness for long.
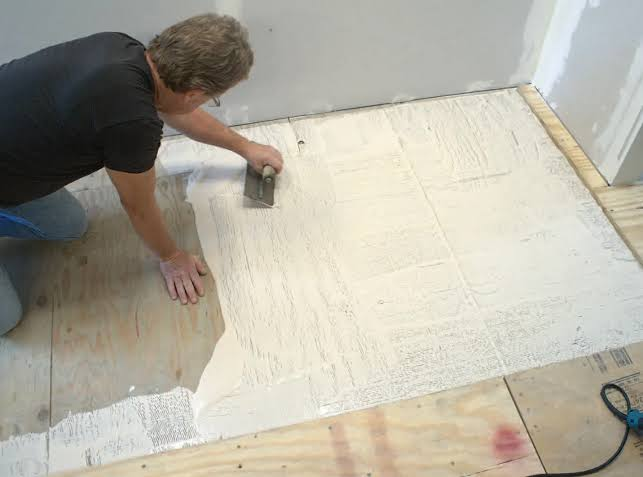
Follow the flooring manufacturer’s requirements because acceptable flatness, underlayment, and moisture conditions differ between products.
- Repair Cracks and Holes
Clean loose material from cracks, chips, screw holes, and gouges. Use a patching product designed for the subfloor. Large concrete cracks or moving structural cracks may need professional evaluation rather than a simple surface filler.
- Level Uneven Areas
Check the floor with a long straightedge. Mark dips and raised areas. Grind or scrape high spots only with proper dust control, and fill low areas with a compatible patch or leveling compound.
- Remove Remaining Dust and Adhesive
Vacuum slowly in more than one direction. Wipe or clean the floor as required for the chosen installation system. Even a thin layer of dust can weaken primer, patching compound, underlayment tape, or flooring adhesive.
- Check for Moisture Problems
Look for stains, mold, damp smells, swollen wood, plumbing leaks, and moisture entering through concrete. Correct the source before installing anything new. Covering a damp floor traps the problem and may ruin both the subfloor and replacement material.
- Choose the Next Flooring Material
Select flooring based on moisture exposure, traffic, pets, maintenance, comfort, installation skill, and budget. Measure the finished floor height as well. The new surface should meet doors, cabinets, stairs, and neighboring floors without creating unsafe transitions.
Best Budget-Friendly Flooring After Tile Removal
Once the subfloor is prepared, several affordable flooring options can update the space. Compare the total installed cost rather than the product price alone. Underlayment, trims, adhesives, moisture barriers, tools, and repairs may change which option offers the best value.
Samples are helpful because color, texture, and sheen often look different under household lighting.
- Luxury Vinyl Plank
Luxury vinyl plank resists everyday moisture and comes in many wood and stone styles. Click-lock products are popular for DIY installation, although the subfloor must still be flat. Thin planks will not hide deep dips or raised adhesive.
- Laminate Flooring
Laminate offers a realistic wood look at a moderate cost. It installs quickly as a floating floor, but seams and edges need protection from standing water. Choose a product rated for the room’s expected moisture and traffic.
- Sheet Vinyl
Sheet vinyl is affordable, easy to clean, and useful in kitchens, bathrooms, and laundry areas. Fewer seams reduce places where water can enter. However, every bump beneath the sheet may eventually show through the surface.
- Engineered Wood
Engineered wood provides a real wood surface with greater dimensional stability than many solid wood floors. Prices vary, but entry-level options may fit a moderate budget. Moisture conditions and installation instructions still require careful attention.
- New Tile
New tile remains durable, water-resistant, and available in styles for almost any room. After removing outdated bathroom flooring, explore these bathroom tile ideas for patterns, colors, layouts, and practical design inspiration.
Common Tile Removal Mistakes
Most tile removal problems come from poor preparation rather than a lack of strength. Rushing can damage the subfloor, spread dust, cause injuries, and increase disposal costs.
The best results come from treating demolition as a controlled process. Use the right equipment, pause when conditions change, and inspect each newly exposed section before continuing.
- Skipping Safety Equipment
Removing one tile without protection may seem harmless, but the first strike can send fragments toward the face. Put on eye, hand, hearing, foot, and breathing protection before beginning, not after dust and debris appear.
- Starting in the Wrong Place
Starting beside a cabinet, water line, or fragile fixture limits tool movement. Choose an open area, exposed edge, loose tile, or damaged section. A practical starting point makes every later row easier to lift.
- Using Too Much Force
More force does not always mean faster progress. Heavy downward blows can break plywood, chip concrete, damage heating systems, and bury a chisel in the subfloor. Improve the tool angle or change attachments before striking harder.
- Ignoring Subfloor Damage
Do not cover soft plywood, moving panels, major cracks, or damp concrete with new flooring. The finished surface will only be as reliable as the base beneath it. Repairing problems now prevents loose boards, cracked tiles, odors, and failed joints later.
- Underestimating Cleanup
Demolition creates more than visible tile pieces. Fine dust settles on walls, cabinets, vents, tools, and neighboring floors. Allow time for vacuuming, wiping surfaces, cleaning equipment, and replacing filters. This deep cleaning guide offers useful ideas for restoring a kitchen after messy renovation work.
Conclusion
Learning how to remove a tile floor is mostly about preparation, patience, and control. The process begins with protecting the room and choosing the right starting point. It ends only after the adhesive is removed, debris is disposed of, and the subfloor is inspected and repaired.
Work in small sections, keep tools at a low angle, control dust, and avoid lifting containers that are too heavy. With a careful approach, many DIY tile removal projects can create a safe, smooth foundation for attractive new flooring.
Frequently Asked Questions
The easiest way to remove floor tiles is to start at a loose tile or exposed edge. Break one tile, create room for a wide scraper, and work in rows. A powered demolition hammer with a flat chisel can speed up firmly bonded installations.
It is often possible, but no method guarantees zero damage. To learn how to remove tile without damaging subfloor materials, keep the scraper at a shallow angle, work slowly, identify the subfloor first, and stop whenever hidden fasteners, wires, pipes, or heating systems appear.
A power tool is not always necessary. Hand tools may handle a small bathroom or loosely bonded ceramic floor. A rotary hammer, electric tile removal tool, or tile removal machine becomes useful when the tiles cover a large area or the mortar resists manual scraping.
To remove thinset from concrete, begin with a sharp floor scraper. For hard ridges, use a rotary hammer in chisel-only mode with a wide scaling blade. Hold it almost parallel to the floor and move steadily without digging downward into the slab.
Some flooring can be installed over tile when the existing surface is flat, clean, dry, stable, and allowed by the manufacturer. However, covering tile raises the finished floor and may hide loose tiles, moisture problems, cracked grout, or an unstable base.
Tile removal is very messy. It creates sharp fragments, fine dust, mortar chips, and heavy debris. Sealing doorways, covering nearby surfaces, running a shop vacuum, and removing waste in small loads can keep the mess controlled and prevent dust from spreading.
The cost to remove tile flooring varies by region, room size, tile type, mortar thickness, accessibility, disposal needs, and subfloor repairs. Contractors may quote a tile removal cost per square foot or provide one project price after inspecting the floor.
Renters should remove tile only after receiving clear written permission from the property owner or manager. The agreement should identify the approved replacement, who performs the work, who pays for damage and disposal, and whether the original flooring must be restored later.