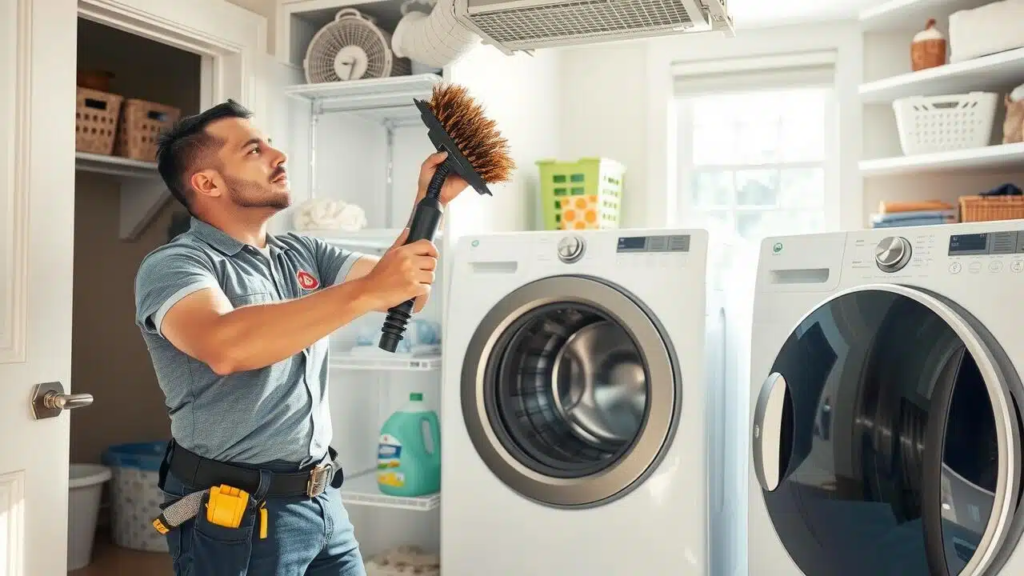
Home dryer vent cleaning is one of those simple home tasks that can make a big difference. A clean vent helps your dryer work faster, keeps your laundry area safer, and may lower energy waste. Best of all, many basic cleaning steps are easy to do at home.
What Is Home Dryer Vent Cleaning?
Home dryer vent cleaning means removing lint, dust, pet hair, and debris from the dryer vent system. This includes the lint trap, the vent hose behind the dryer, the wall duct, and the outdoor vent cover. When the dryer runs, it pushes hot, moist air outside. If lint blocks that path, the dryer has to work harder. Over time, this can lead to longer drying times, extra heat, musty laundry, and even safety risks.
Why Home Dryer Vent Cleaning Matters?
A dryer vent may not look important, but it works like a breathing tube for your dryer. When it gets clogged, hot air cannot escape well. That small problem can affect safety, drying speed, energy use, and the life of your appliance.
- Fire Safety
Lint is light, dry, and easy to ignite. When it builds up inside a vent, it can trap heat near the dryer. Regular lint vent cleaning helps reduce this risk and keeps the dryer area safer for everyday use.
- Better Dryer Performance
A clean vent lets hot air move freely. As a result, clothes dry faster and more evenly. If towels, jeans, or bedding keep coming out damp, a dryer vent blockage may be slowing everything down.
- Lower Energy Bills
When your dryer needs two or three cycles to dry one load, it uses more power. Clean airflow helps the machine finish its job sooner. Over time, this can help reduce wasted energy in a busy home.
- Longer Dryer Lifespan
A clogged vent makes the dryer work like a car driving uphill every day. The motor, heating parts, and sensors carry more stress. Regular clothes dryer vent cleaning can help the appliance last longer and run better.
Signs Your Dryer Vent Needs Cleaning
Dryer vents usually give warning signs before they become a serious problem. You may notice slower drying, extra heat, odd smells, or lint around the dryer. These signs are easy to miss at first, but they are worth checking.
- Clothes Take Too Long to Dry
If one normal load takes more than one cycle, the dryer may not be the only issue. A clogged vent can trap moist air inside the drum. The clothes tumble, but the moisture has nowhere to go.
- Dryer Feels Hot
A dryer will feel warm during use, but it should not feel overly hot. If the top, sides, or laundry room feel hotter than usual, airflow may be blocked. Turn it off and inspect the vent safely.
- Burning Smell
A burning smell is a serious warning sign. Lint may be too close to heat, or the dryer may be overheating. Stop the dryer right away, unplug it, and check the vent before using it again.
- Lint Around the Vent
Lint around the hose connection, floor, wall opening, or outdoor cover means lint is escaping where it should not. This can happen when the hose is loose, cracked, crushed, or clogged inside.
- Weak Outdoor Airflow
Go outside while the dryer is running and feel the vent opening. You should feel steady warm air. If airflow is weak or missing, the duct may be blocked with lint, a bird nest, leaves, or other debris.
- Laundry Room Feels Humid
A humid laundry room can mean moist air is leaking inside instead of venting outside. This may leave walls, floors, and nearby storage areas damp. Over time, extra moisture can also lead to musty smells.
How Often Should You Clean a Dryer Vent?
Most homes should clean the dryer vent at least once a year. However, some homes need it more often. Laundry habits, pets, dryer age, vent length, and family size all matter. Think of it as routine home maintenance, not a one-time fix.
- For Small Households
A small household that does only a few loads each week may need annual dryer exhaust vent cleaning. Still, clean the lint trap after every load and check airflow every month. Small use does not mean zero buildup.
- For Large Families
Large families often run the dryer daily. Towels, school clothes, sports gear, bedding, and uniforms create lots of lint. In this case, check the vent every few months and do a deeper cleaning at least twice a year.
- For Pet Owners
Pet hair mixes with lint and sticks inside vents. If you have cats or dogs, your dryer vent can clog faster. Wash pet blankets separately when possible, clean the lint trap carefully, and inspect the vent more often.
- For Older Dryers
Older dryers may not push air as strongly as newer models. They can also have worn seals, weaker parts, or less accurate sensors. If your dryer is older, regular residential dryer vent cleaning can help keep it safer and more useful.
Tools Needed for Home Dryer Vent Cleaning
You do not need a garage full of tools to clean a dryer vent. A few simple items can handle most basic jobs. Gather everything first so you do not have to stop halfway through the task with the dryer pulled out.

- Dryer Vent Brush Kit
A dryer vent brush kit usually includes a long flexible brush and extension rods. It helps reach deep into the vent duct. Choose a kit made for dryer vents, not a stiff tool that could damage the duct.
- Vacuum Cleaner
A vacuum with a hose attachment is very useful for loose lint. It can clean behind the dryer, around the wall opening, and inside short vent sections. A shop vacuum works well, but a standard vacuum can also help.
- Screwdriver
Many dryer vent hoses are held by metal clamps. A screwdriver helps loosen and tighten those clamps. Keep the screws in a small bowl or cup so they do not roll behind the appliance.
- Gloves and Mask
Lint, dust, and old debris can irritate your hands, nose, or throat. Gloves protect your skin, and a mask helps when dust is heavy. This is especially helpful in tight laundry closets or older homes.
- Flashlight
A flashlight lets you see inside the hose, wall vent, and outdoor cover. It also helps you spot crushed ductwork, loose clamps, holes, or lint packed into corners where normal room light cannot reach.
How to Clean a Dryer Vent at Home?
The best dryer vent cleaning steps are simple, careful, and steady. Do not rush. A dryer is heavy, and vent parts can bend easily. Give yourself enough space, protect the floor, and work in order from inside to outside.

- Unplug the Dryer
Always unplug the dryer before cleaning. If you have a gas dryer, turn off the gas supply if you need to move or disconnect anything near the gas line. Safety comes first, even for a small dryer vent cleaning DIY task.
- Pull the Dryer Away from the Wall
Slide the dryer forward slowly. Do not yank it. The vent hose, power cord, or gas line may be tight behind it. Move it just far enough to reach the back comfortably without stretching connections.
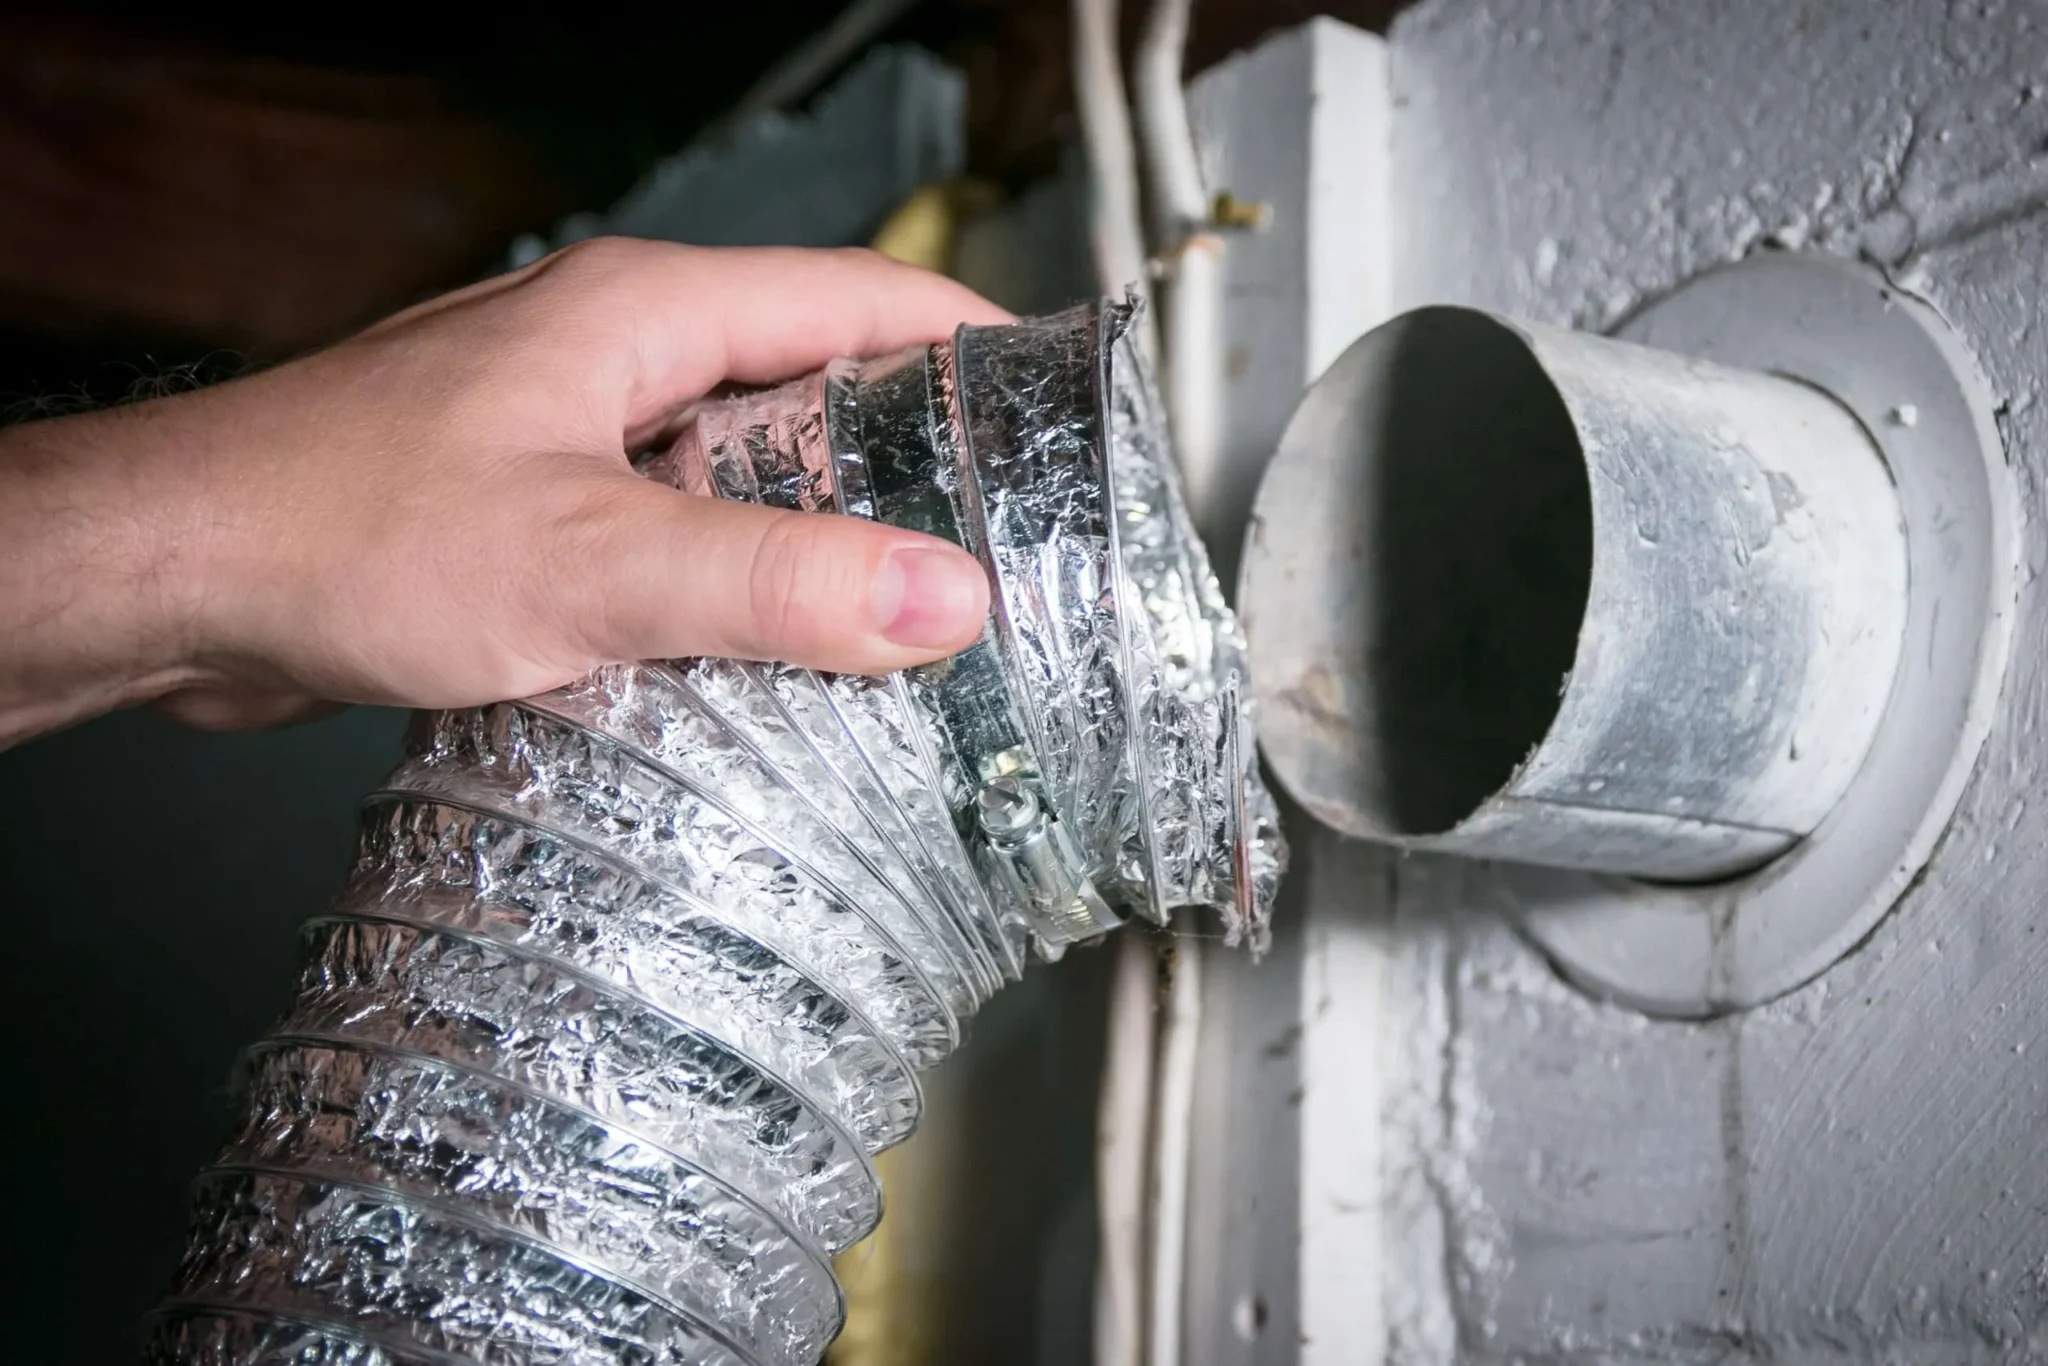
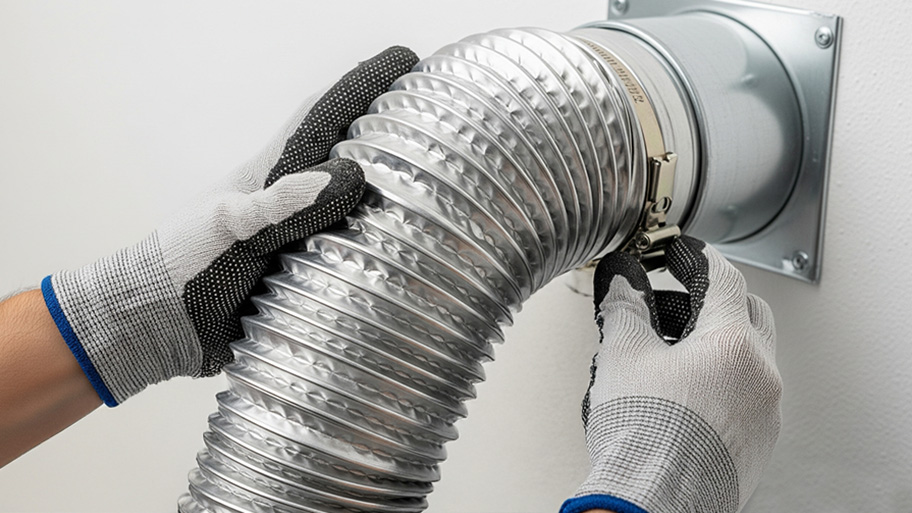
- Disconnect the Vent Hose
Loosen the clamp that holds the hose to the dryer. Then remove the hose from the wall connection if needed. Check the hose for lint, holes, crushed spots, or sharp bends. Damaged hoses should be replaced.
- Remove Lint from the Hose
Use your vent brush to loosen lint inside the hose. Then vacuum out the debris. Work gently so you do not tear flexible duct material. If the hose is packed, brittle, or crushed, replacement may be safer than cleaning.
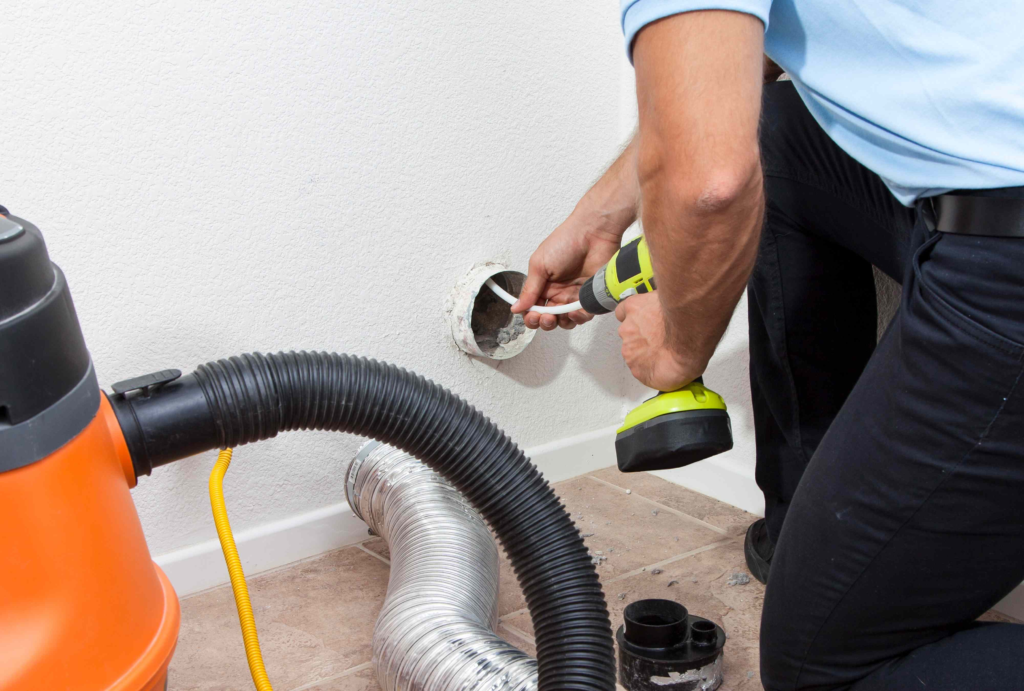
- Clean the Wall Vent
Insert the brush into the wall duct and move it carefully. Rotate it as you go, then pull lint back toward you. Vacuum around the opening. Do not force the brush if it hits a sharp bend or blockage.
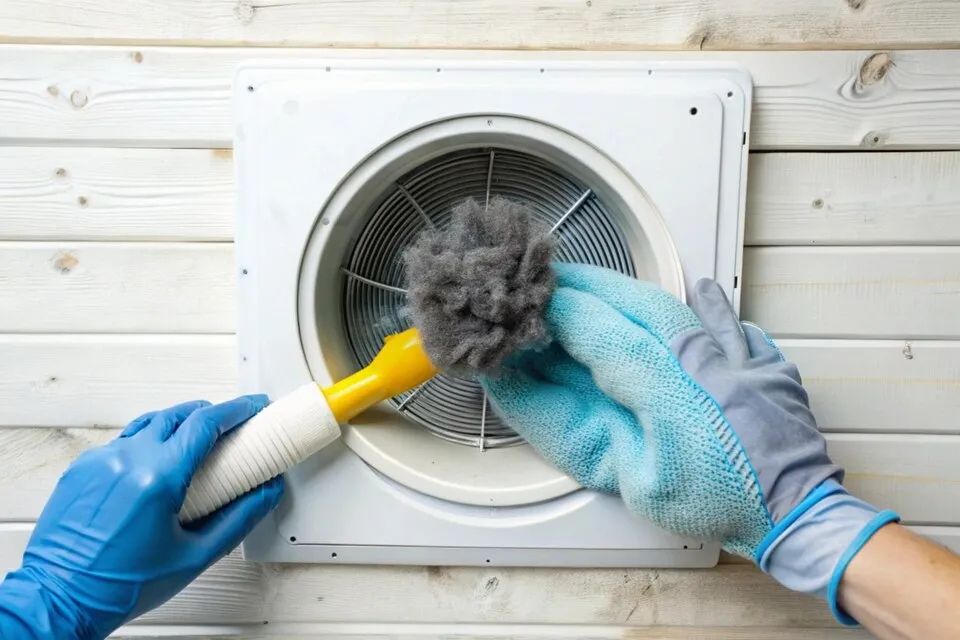
- Check the Outdoor Vent Cover
Go outside and inspect the vent cover. Remove lint, leaves, dirt, or small debris. Make sure the flap opens when the dryer runs. If the cover is stuck, blocked, or broken, airflow will suffer even after indoor cleaning.
- Reconnect and Test the Dryer
Reconnect the hose, tighten the clamps, and slide the dryer back carefully. Keep the hose as straight as possible. Plug the dryer in, run a short air cycle, and check outside for strong airflow.
Indoor vs. Outdoor Dryer Vent Cleaning
Good dryer maintenance has two sides: inside and outside. Indoor cleaning handles the dryer, hose, and wall connection. Outdoor cleaning handles the vent cover and exit point. Both matter because lint can gather anywhere along the airflow path.
- Cleaning Behind the Dryer
The space behind the dryer collects lint, dust, lost socks, and sometimes small items. Vacuum this area every time you move the dryer. A clean back area also makes it easier to notice leaks, loose clamps, or damaged hoses.
- Cleaning the Vent Duct
The vent duct carries moist air from the dryer to the outside. Short, straight ducts are easier to clean. Long ducts with bends need more care. If your brush cannot reach the full duct, professional help may be smart.
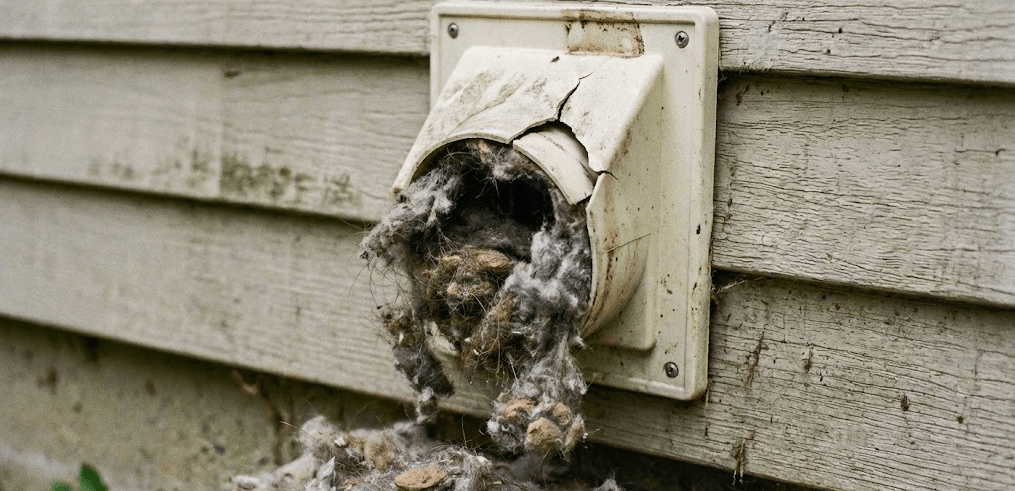
- Cleaning the Exterior Vent
The outdoor vent is easy to forget because it is outside the laundry room. Check it during yard work, seasonal cleanup, or gutter cleaning. A blocked exterior vent can trap heat and moisture inside the whole system.
Common Dryer Vent Cleaning Mistakes
Most dryer vent problems come from simple mistakes. The good news is that they are easy to avoid. A careful approach protects your dryer, your home, and your time. When in doubt, stop and inspect before forcing anything.
- Forgetting to Unplug the Dryer
Never clean behind or inside dryer connections while the dryer is plugged in. Even if you are only vacuuming lint, unplugging lowers risk. For gas dryers, be extra careful around the gas line and shutoff valve.
- Ignoring the Outside Vent
Many people clean the lint trap and hose but forget the outdoor vent. That is like cleaning one end of a straw while leaving the other end blocked. Air still cannot move well if the exit is clogged.
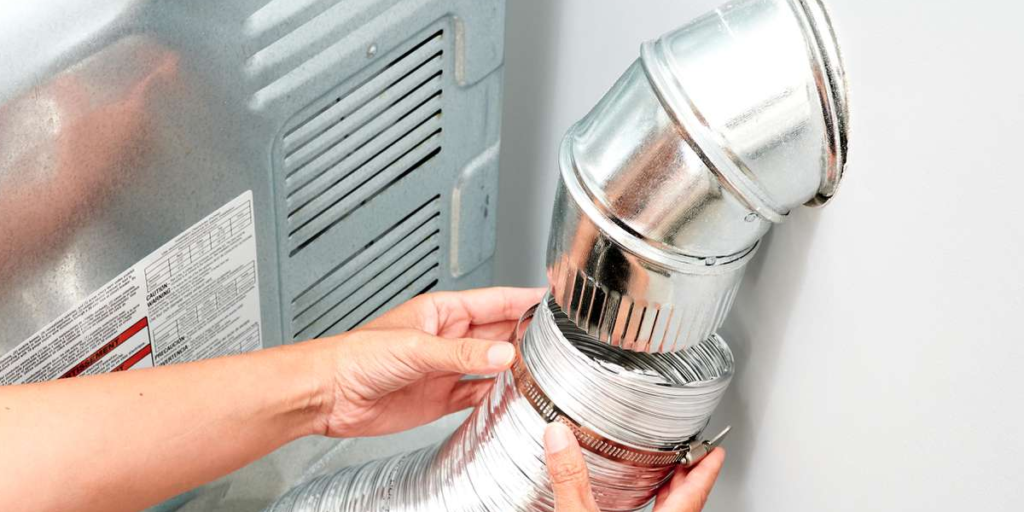
- Using the Wrong Vent Hose
Plastic or thin foil-style hoses can crush, sag, or trap lint. A rigid or semi-rigid metal duct is often a better choice where allowed. The right hose helps improve airflow and reduces lint pockets.
- Pushing Lint Deeper Inside
A brush can help, but it can also push lint farther into the duct if used carelessly. Work in small sections. Pull debris back toward you when possible, then vacuum it out before moving deeper.
- Skipping Regular Maintenance
Waiting until the dryer stops working is not a plan. Dryer vents collect lint slowly, load after load. Add vent checks to your home routine so the problem never gets too big or too expensive.
DIY Dryer Vent Cleaning vs. Professional Cleaning
Some dryer vents are easy to clean yourself. Others are long, hidden, high, or hard to reach. The choice between DIY work and a dryer vent cleaning service depends on your setup, comfort level, tools, and safety concerns.
- When DIY Cleaning Works
DIY cleaning works well when the dryer is easy to move, the hose is short, and the outdoor vent is simple to reach. If you can disconnect, brush, vacuum, and reconnect safely, basic maintenance is usually manageable.
- When to Call a Professional
Call a professional when the vent runs through walls, ceilings, roofs, or long duct paths. Also call if you smell burning, see poor airflow after cleaning, or manage rental properties. Scheduled home cleaning support can also help busy households stay ahead of maintenance tasks.
- Cost Comparison
DIY cleaning costs less upfront because you mainly pay for tools. A brush kit and basic supplies may last years. Professional residential dryer vent cleaning costs more, but it may save time and catch problems you cannot see.
- Safety Considerations
Choose DIY only when you can work safely. Do not climb high ladders, open complex ductwork, or handle gas connections without proper knowledge. A small cleaning job should never turn into a risky repair project.
How to Keep Your Dryer Vent Cleaner Longer?
Cleaning the vent is important, but prevention matters too. Small habits can slow lint buildup and keep airflow strong. The goal is not a perfect laundry room. The goal is a safer, cleaner, easier system that works every week.
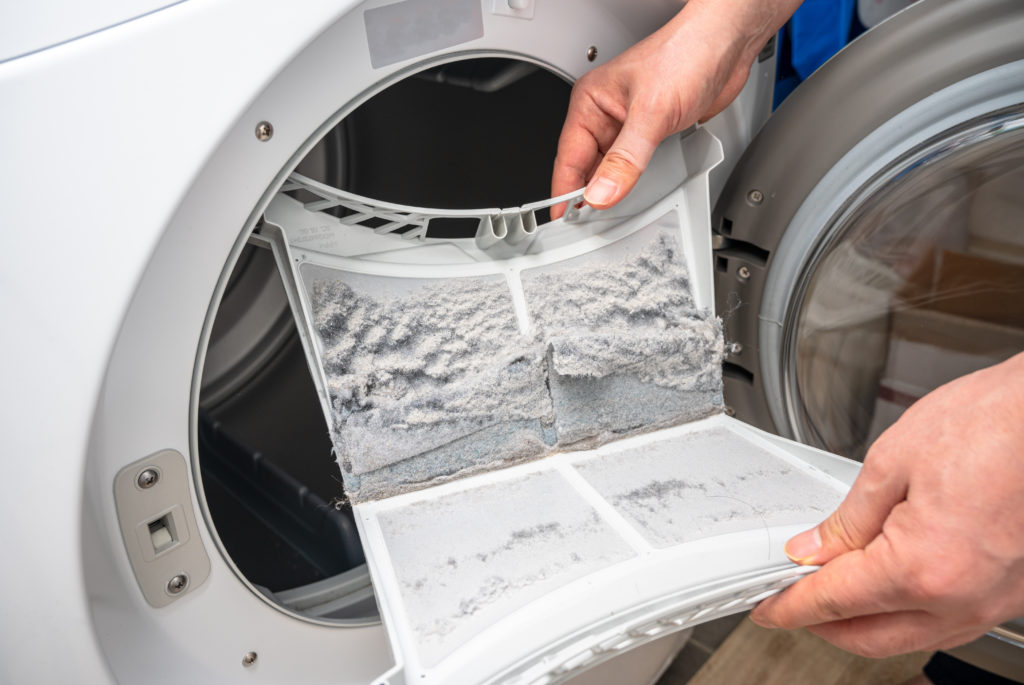
- Clean the Lint Trap Every Load
Clean the lint screen before or after every load. This is the simplest way to reduce lint entering the vent. Wash the screen occasionally with mild soap and water if dryer sheet residue makes it feel waxy.
- Avoid Overloading the Dryer
Overloaded dryers cannot tumble clothes well. Heavy loads create more lint, trap moisture, and take longer to dry. Dry bulky items like blankets or towels in smaller loads so air can move through the fabric.
- Use the Right Dryer Settings
High heat is not always better. Use the right setting for each fabric type. Lower heat or sensor dry settings can reduce stress on clothes and the dryer. They can also help prevent overheating when airflow is limited.
- Keep the Laundry Area Dust-Free
Dust and lint love corners, shelves, baskets, and the floor behind appliances. Wipe surfaces and vacuum often. If you already follow a regular kitchen cleaning routine, add the laundry area to the same habit.
- Check the Outdoor Vent Often
Walk outside while the dryer runs and check the vent flap. It should open freely and push out warm air. Remove lint or leaves around it. In winter, also check for snow or ice blocking the outlet.
- Replace Damaged Vent Hoses
A crushed or ripped vent hose can undo all your cleaning work. Replace hoses that are cracked, sagging, kinked, or hard to reconnect. Keep the duct path short and straight whenever the laundry layout allows.
Dryer Vent Cleaning for Small Homes and Apartments
Small spaces make dryer care more challenging. Laundry closets, stacked units, and tight corners can hide lint buildup. Still, you can keep things safer with smart checks, careful cleaning, and clear communication with property managers when needed.

- Limited Space Tips
Use a slim vacuum attachment, a flexible brush, and a flashlight. Move baskets, shelves, and storage bins before cleaning. If the dryer cannot move far, clean what you can reach and check the outdoor airflow carefully.
- Stackable Washer-Dryer Units
Stacked units can be harder to move and reconnect. Do not pull them out alone if they feel unstable. Clean the lint trap often, inspect visible hose sections, and call for help if the vent path is hidden.
- Rental Home Safety Tips
Renters should still clean the lint trap and visible lint around the dryer. However, do not take apart ducts or move heavy appliances if your lease does not allow it. Report slow drying or burning smells quickly.
- When to Contact a Landlord
Contact your landlord if the dryer takes too long, the vent cover is broken, or the duct seems blocked inside the wall. Put the request in writing so there is a clear record of the maintenance issue.
Budget-Friendly Dryer Vent Maintenance Tips
Dryer vent care does not need to be expensive. A few low-cost tools and steady habits can prevent bigger problems. Think of maintenance like brushing your teeth: small work now helps avoid painful repairs later.
- Low-Cost Tools
A simple vent brush, vacuum hose attachment, screwdriver, gloves, and flashlight can handle many basic jobs. You do not need fancy equipment for routine cleaning. Store these tools together so they are easy to find.
- Simple Monthly Checks
Once a month, check the lint trap, hose area, and outdoor airflow. These quick checks work like early warning signs. Just as you might learn how to unclog a sink before calling a plumber, small inspections can prevent bigger repair bills.
- Preventing Costly Repairs
A clogged dryer can overheat, wear out parts, and strain the motor. Cleaning the vent helps protect the appliance. It also helps you notice damaged hoses, loose clamps, or moisture issues before they become expensive.
- Saving Energy at Home
Shorter drying times mean less energy use. Try drying similar fabrics together, using sensor dry settings, and cleaning the lint trap every load. These small steps can support a more efficient and budget-friendly home.
When Dryer Vent Cleaning Is Not Enough?
Sometimes cleaning helps, but the problem remains. This means something else may be wrong. Like a clogged sink that keeps backing up after a quick fix, a dryer may need deeper troubleshooting when the same signs return.
- Dryer Still Takes Too Long
If clothes stay damp after cleaning the vent, check the load size, dryer settings, lint screen, and outdoor airflow. If everything looks fine, the dryer may have a heating problem, sensor issue, or internal lint buildup.
- Vent Hose Is Crushed
A crushed hose blocks airflow even when it is clean. This often happens when the dryer is pushed too close to the wall. Replace the hose and leave enough space so it does not fold behind the machine.
- Duct Is Too Long or Bent
Long ducts with many bends collect lint faster. Each turn slows airflow. If your laundry room layout forces a long vent path, you may need more frequent dryer exhaust vent cleaning or a professional inspection.
- Dryer Needs Repair
If the dryer runs but does not heat, stops mid-cycle, or makes odd noises, cleaning alone may not solve it. The appliance may need a new part, sensor repair, belt repair, or professional service.
- Moisture or Mold Issues
Moisture around the dryer can point to poor venting, leaks, or indoor exhaust. Fix moisture quickly because damp spaces can lead to musty smells, stains, or mold growth.
Home Dryer Vent Cleaning Checklist
A checklist makes the job easier and safer. Use it before, during, and after cleaning so you do not miss small details. Keep it near your laundry supplies or save it on your phone for quick use.
- Before Cleaning
Unplug the dryer. Move laundry baskets and rugs. Gather your brush kit, vacuum, screwdriver, gloves, mask, and flashlight. If you have a gas dryer, know where the shutoff valve is before moving anything.
- During Cleaning
Work from the dryer to the wall, then from the wall to the outside vent. Brush gently, vacuum loose lint, and inspect each connection. Avoid forcing tools through tight bends or unknown duct paths.
- After Cleaning
Reconnect the hose securely. Keep it straight and smooth. Push the dryer back slowly without crushing the vent. Run a short cycle and check the outdoor vent for strong airflow and a working flap.
- Monthly Maintenance
Clean the lint trap every load. Check behind the dryer for lint. Look at the outdoor vent. Watch for slow drying, heat, humidity, or odd smells. These simple habits keep the system working better.
Conclusion
Home dryer vent cleaning is a small task with big rewards. It helps clothes dry faster, lowers stress on the dryer, reduces wasted energy, and supports better fire safety. With basic tools and careful steps, many people can handle simple dryer vent cleaning DIY work. For long ducts, roof vents, burning smells, or repeated dryer vent blockage, a professional dryer vent cleaning service is the safer choice.
Frequently Asked Questions
You may have a clogged dryer vent if clothes take too long to dry, the dryer feels very hot, or the laundry room feels humid. A burning smell, lint around the hose, or weak outdoor airflow are also warning signs. Check the outside vent while the dryer runs. If little air comes out, there may be a dryer vent blockage.
Yes, you can clean many dryer vents yourself if the dryer is easy to move and the vent hose is simple to reach. Use a dryer vent brush kit, vacuum, gloves, screwdriver, and flashlight. Always unplug the dryer first. If the duct is long, hidden, or hard to access, call a professional for safer clothes dryer vent cleaning.
Most homes should clean the dryer vent at least once a year. Larger families, pet owners, and homes that run the dryer often may need cleaning every three to six months. Clean the lint trap after every load. Also check outdoor airflow monthly so you can spot problems before they become serious.
If you never clean your dryer vent, lint can build up inside the hose, duct, and outdoor vent. This can make clothes dry slowly, raise energy use, overheat the dryer, and shorten the appliance’s life. In serious cases, trapped lint and heat can also increase fire risk. Regular lint vent cleaning prevents many of these problems.
The cost of a professional dryer vent cleaning service depends on your home, vent length, location, and how hard the duct is to access. A simple first-floor vent usually costs less than a long duct running through walls, ceilings, or a roof. Ask what the service includes before booking, such as duct brushing, airflow testing, and exterior vent cleaning.
Yes, a clogged dryer vent can increase fire risk because lint is dry and easy to ignite. When airflow is blocked, heat can build up inside the dryer and duct. Cleaning the lint trap helps, but it is not enough by itself. Regular dryer exhaust vent cleaning removes hidden lint from the full vent path.
Clothes may stay damp because the load is too large, the dryer setting is wrong, or the lint trap is full. However, poor airflow is a common cause. If moist air cannot leave through the vent, clothes will not dry well. Clean the hose, wall duct, and outdoor vent. If the problem continues, the dryer may need repair.
Renters should clean the lint trap after every load and keep the visible laundry area free of lint. However, they should usually contact the landlord for duct cleaning, damaged vent hoses, blocked exterior vents, or dryer repairs. If you smell burning, notice extreme heat, or see weak airflow, report the issue right away in writing.