
Learning how to fix a leaky faucet can save money, reduce water waste, and make your kitchen or bathroom feel calmer again. That tiny drip may seem harmless, but it often points to a worn part inside the faucet. The good news is that many faucet leaks are simple DIY fixes.
What Is a Leaky Faucet?
A leaky faucet is a faucet that lets water escape when it should be fully off. Sometimes the water drips from the spout. Other times, it leaks around the handle, base, or under the sink. A sink faucet leaking slowly can be easy to ignore, especially when the drip sounds small. However, that steady drip is like a tiny clock counting up your water bill.
A faucet leaking when turned off usually means something inside is worn, loose, cracked, or dirty. The exact fix depends on your faucet type and where the leak appears.
Why Fix a Leaky Faucet Quickly?
A leaky faucet repair may not feel urgent, but it is one of those small home jobs that can grow into a bigger problem. A drip can waste water, stain the sink, damage the cabinet below, and leave mineral marks around the fixture. In a bathroom, constant moisture can also make the area feel less fresh.
Fixing the leak quickly keeps the space clean and comfortable. It also protects your sink, countertop, and under-sink storage. Even better, a leaky faucet fix often costs only a few dollars if the problem is a washer, O-ring, seal, or cartridge.
Common Causes of a Leaky Faucet
Most faucet leaks come from small parts that wear down over time. These parts handle pressure every day, so they slowly lose their shape. Before you grab tools, it helps to understand what might be causing the drip. This makes DIY faucet repair much less confusing.
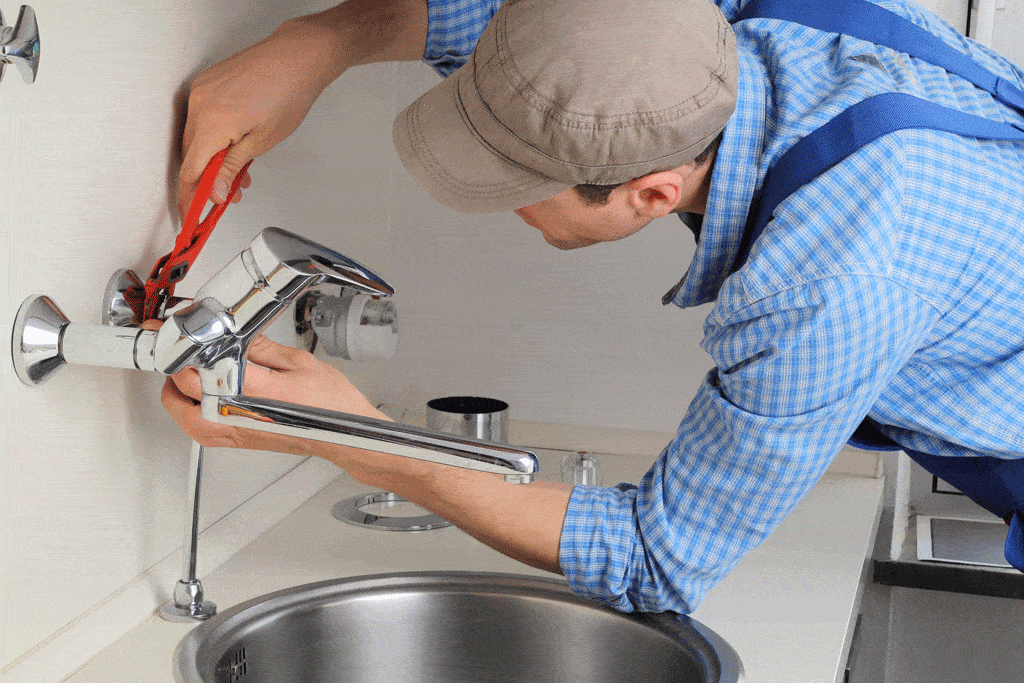
- Worn Washer
A worn washer is one of the most common reasons for compression faucet repair. The washer presses against the valve seat to stop water flow. Over time, it can flatten, crack, or harden. When that happens, water slips through and creates a steady drip from the spout.
- Damaged O-Ring
An O-ring is a small rubber ring that helps seal moving parts. If water leaks near the handle or base, the O-ring may be worn out. This is common in single handle faucet repair because the handle moves often and puts stress on the seal.
- Loose Parts
Faucets have screws, nuts, stems, caps, and handles that can loosen with daily use. If a part shifts out of place, water can escape through tiny gaps. A loose packing nut or handle screw may cause a leak around the handle instead of the spout.
- Worn Cartridge
A worn cartridge is a common reason for cartridge faucet repair. The cartridge controls hot and cold water flow. When it wears out, the faucet may drip even when the handle is off. If you want to know how to repair a dripping faucet, checking the cartridge is often a smart step.
- Corroded Valve Seat
The valve seat connects the faucet body and spout area. Hard water, mineral buildup, and corrosion can damage this part. When the valve seat becomes rough, the washer cannot seal tightly. This often causes dripping from the spout even after replacing other parts.
- High Water Pressure
High water pressure can make a faucet drip at certain times of day or after use. Pressure pushes against seals and washers like wind pushing against a weak window. If several faucets leak or pipes make noise, water pressure may be part of the problem.
Types of Faucets You May Have
Before you learn how to fix a faucet leak, you need to know what kind of faucet you have. Each faucet type works a little differently. Once you identify the design, the repair becomes much easier and less like guessing in the dark.
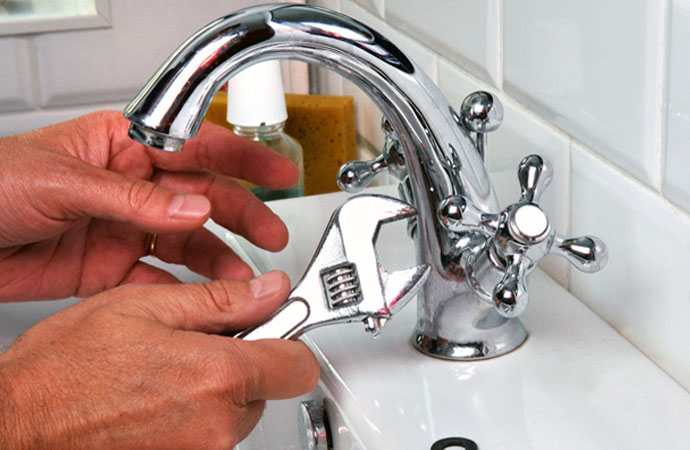
- Compression Faucet
A compression faucet usually has two handles: one for hot water and one for cold water. You turn the handles to tighten or loosen the water flow. These faucets often leak because of worn washers. Compression faucet repair is usually simple and budget-friendly.
- Ball Faucet
A ball faucet is usually a single-handle faucet often found in kitchens. Inside, a rounded ball controls water flow and temperature. Ball faucet repair can involve several small parts, including springs, seals, and the ball assembly, so keeping parts organized matters.
- Cartridge Faucet
A cartridge faucet may have one handle or two handles. The handle usually moves smoothly instead of tightening down hard. Cartridge faucet repair often means removing the old cartridge and installing a matching replacement. This is a common fix for modern bathroom faucet leaking problems.
- Ceramic Disc Faucet
A ceramic disc faucet is a newer, durable style. It uses two ceramic discs to control water flow. Ceramic disc faucet repair often involves cleaning or replacing rubber seals inside the cylinder. These faucets usually last a long time, but mineral buildup can still cause leaks.
- How to Identify Your Faucet Type?
Look at how the handle moves. If you must twist the handle down firmly, it is likely a compression faucet. If one kitchen handle moves over a rounded cap, it may be a ball faucet. If the handle lifts or turns smoothly, it may be cartridge or ceramic disc.
Tools and Supplies You Need
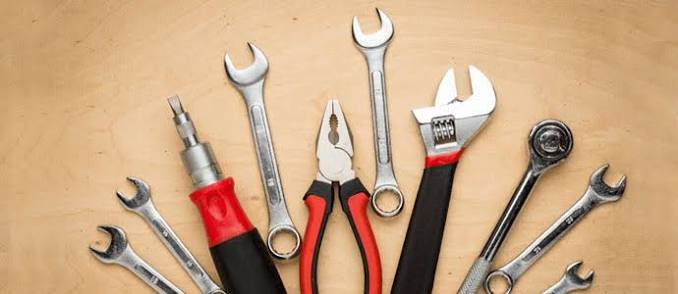
You do not need a full workshop to learn how to fix a leaky sink faucet. Most repairs need basic hand tools, a few replacement parts, and cleaning supplies. Gather everything first so you do not have to stop halfway with faucet parts spread across the counter.
- Basic Tools
Start with an adjustable wrench, Phillips screwdriver, flathead screwdriver, Allen wrench, and needle-nose pliers. A utility knife may help remove decorative caps. Keep a small flashlight nearby, especially for under-sink work. These basic tools cover most leaky faucet repair tasks.
- Replacement Parts
Common replacement parts include washers, O-rings, cartridges, springs, seals, and faucet repair kits. The best part depends on your faucet type. When possible, take the old part to the store so you can match the size, shape, and brand more accurately.
- Cleaning Supplies
Keep white vinegar, an old toothbrush, soft cloths, paper towels, and a small bowl nearby. These help clean mineral buildup, dried water stains, and grime. If your kitchen faucet leaking issue leaves residue behind, basic cleaning supplies can make the repair area look fresh again. For a bigger cleanup, use this deep cleaning guide to refresh the whole kitchen area.
- Safety Items
Use gloves if you are working near sharp metal edges or old parts. Safety glasses are helpful when looking under the sink. A towel on the floor can stop slips. Also, never force rusty parts because they can break and turn a small job into a bigger repair.
- Budget-Friendly Tool Tips
You do not need to buy expensive tools for one faucet repair. Borrow tools, buy a simple starter set, or choose a small faucet repair kit. A good adjustable wrench and screwdriver set can help with many future home projects, not just a fix dripping faucet job.
How to Prepare Before Fixing a Leaky Faucet?
Good preparation makes the repair smoother. Think of it like setting up ingredients before cooking. When everything is ready, you move with confidence. Before you begin any DIY faucet repair, clear the area, shut off water, and protect small parts from disappearing.
- Turn Off the Water Supply
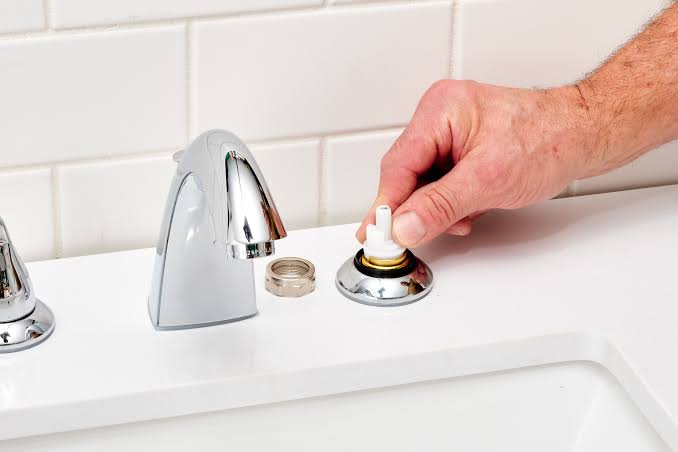
Look under the sink for small shutoff valves. Turn them clockwise until they stop. If there are no working shutoff valves, turn off the main water supply. Then open the faucet to release leftover water pressure before removing any faucet parts.
- Cover the Drain
Tiny screws and washers love to roll into drains. Cover the drain with a plug, rag, or towel before you start. This simple step can save a lot of frustration. It also keeps old parts from falling into the sink trap.
- Take Photos Before Removing Parts
Use your phone to take photos at each step. This is one of the easiest expert tips for how to repair a leaky faucet. The photos act like a map when it is time to put everything back together in the right order.
- Organize Small Screws and Parts
Place screws, caps, washers, and rings in a small bowl or on a towel. Keep them in order as you remove them. If you are doing two handle faucet repair, separate hot-side and cold-side parts so you do not mix them up.
- Check the Faucet Brand or Model
Look for a brand name on the faucet or under the sink. Some brands use specific cartridges or seals. If you can find the model number, buying the right part becomes much easier. This helps avoid extra trips to the hardware store.
How to Fix a Leaky Compression Faucet?
A compression faucet is one of the easiest types to repair. If you are wondering how to stop a faucet from dripping and your faucet has two handles, start here. Most leaks come from worn washers, damaged O-rings, or a rough valve seat.
- Remove the Faucet Handle
After turning off the water, remove the decorative cap on top of the handle. Take out the screw underneath and lift the handle off. If it sticks, wiggle it gently. Do not pry too hard because older handles can crack.
- Take Out the Stem
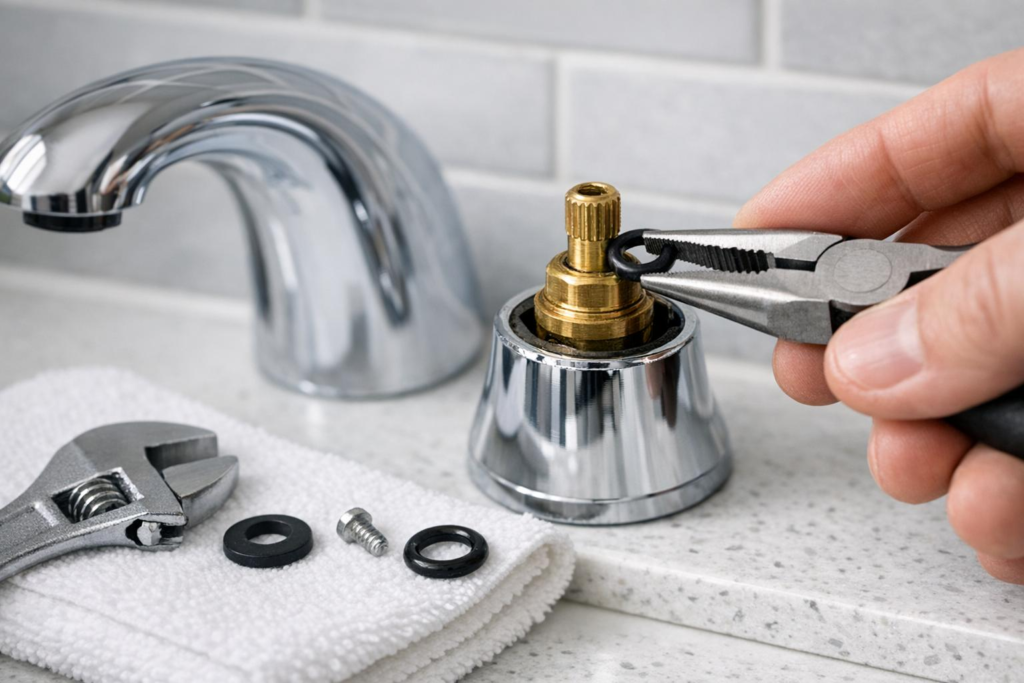
Use an adjustable wrench to loosen the packing nut. Then unscrew and remove the stem. The stem is the part that moves up and down when you turn the handle. Check it for wear, rust, or damaged threads.
- Replace the Washer
At the bottom of the stem, you will usually see a small rubber washer held by a screw. Remove the screw, replace the washer with the same size, and tighten the screw back in place. This simple step often stops the drip.
- Check the O-Ring
Look around the stem for an O-ring. If the faucet leaks around the handle, replace this ring too. Coat the new O-ring lightly with plumber’s grease. This helps it slide into place and creates a better seal.
- Reassemble and Test the Faucet
Put the stem, packing nut, handle, screw, and cap back in place. Turn the water supply on slowly. Then test the faucet. If the drip is gone, the repair worked. If it still leaks, the valve seat may need cleaning or replacement.
How to Fix a Leaky Cartridge Faucet?
Cartridge faucets are common in kitchens and bathrooms. If you need single handle faucet repair, this may be your faucet type. A worn cartridge can cause dripping, stiff handle movement, uneven water temperature, or water leaking around the handle.
- Remove the Handle
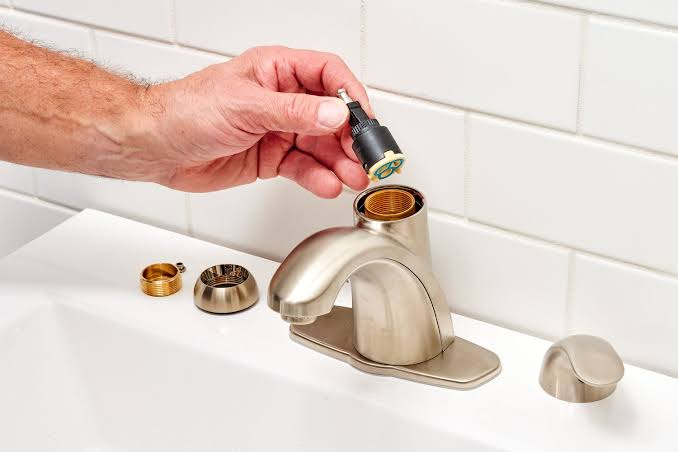
Turn off the water supply first. Then remove the handle screw, which may be hidden under a cap or behind the handle. Lift the handle away carefully. Some faucets also have a retaining clip or nut that holds the cartridge in place.
- Pull Out the Cartridge
Use pliers to grip the cartridge stem and pull it straight up. Do not twist too hard unless your faucet instructions say to. If the cartridge is stuck, mineral buildup may be holding it. Move slowly so you do not damage the faucet body.
- Match the Replacement Cartridge
Cartridges can look similar but fit differently. Take the old cartridge to the hardware store or check the faucet brand and model. Matching the cartridge correctly is key when learning how to repair a dripping faucet without wasting time.
- Install the New Cartridge
Slide the new cartridge into the faucet body in the same direction as the old one. Line up any tabs or notches. Reinstall the retaining clip or nut. If the cartridge is not seated correctly, hot and cold water may not work right.
- Turn the Water Back On and Test
Turn the water back on slowly. Move the handle through hot, cold, low, and high settings. Check the spout, handle, and base for leaks. If everything stays dry, your cartridge faucet repair is complete.
How to Fix a Leaky Ball Faucet?
Ball faucets can look simple from the outside, but they have several parts inside. If your kitchen faucet leaking problem comes from a single-handle faucet with a rounded cap, this section may help. A repair kit usually makes the job easier.
- Remove the Handle and Cap
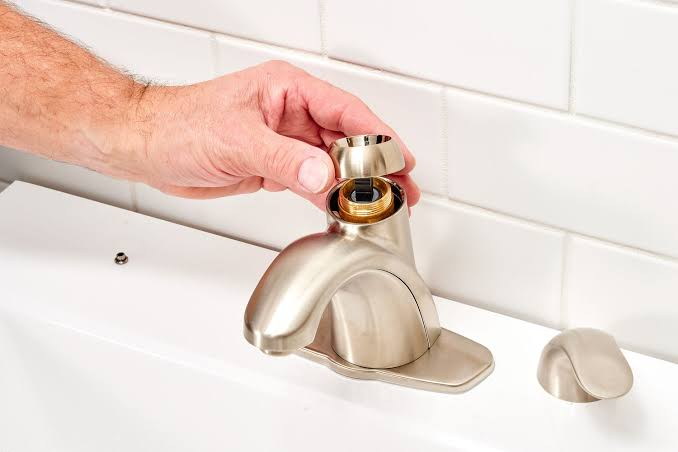
Turn off the water. Loosen the handle screw with an Allen wrench and remove the handle. Then remove the cap and collar. Use care because older caps can scratch or bend. Wrap pliers with tape if you need extra grip.
- Take Out the Ball Assembly
Lift out the ball assembly and note its position. The ball has slots or holes that must line up correctly later. Take a photo before removing it. This small step makes ball faucet repair much easier during reassembly.
- Replace Springs and Seals
Inside the faucet body, you will see rubber seats and small springs. Remove them with needle-nose pliers or a small screwdriver. Install new springs and seals from a repair kit. These parts often cause leaks when they lose tension.
- Reinstall the Ball
Place the ball back into the faucet body, lining up the slot or pin. Reinstall the cam, packing, cap, and handle. Tighten parts firmly, but do not over-tighten. The handle should move smoothly without feeling loose or stiff.
- Check for Drips
Turn the water on and move the handle slowly. Check the spout, handle, and base. If water still drips, the ball may be worn or misaligned. Open the faucet again and confirm that all seals and springs are seated correctly.
How to Fix a Leaky Ceramic Disc Faucet?
Ceramic disc faucets are strong and smooth, but they can still leak when seals get dirty or worn. If you want to know how to fix a dripping tap with a modern faucet, this repair may be the answer.
- Remove the Handle
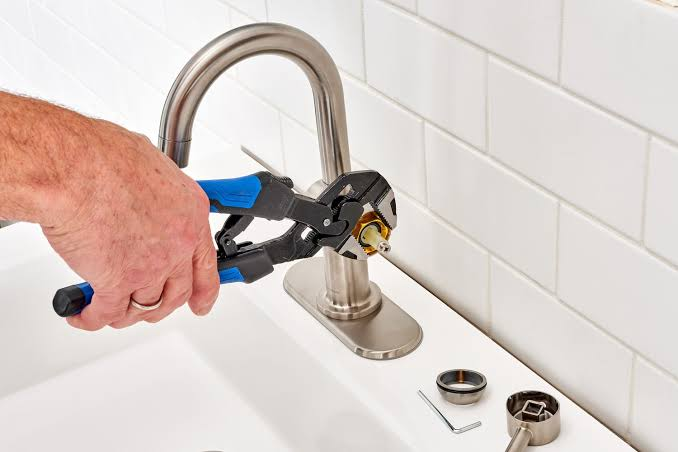
Turn off the water and open the faucet to release pressure. Remove the handle screw, then lift off the handle. Some ceramic disc faucets have a decorative cover under the handle. Remove it carefully so you can reach the cylinder.
- Take Out the Ceramic Cylinder
Unscrew or loosen the mounting parts that hold the ceramic cylinder. Lift it out gently. The cylinder contains the ceramic discs that control water flow. Avoid dropping it because ceramic pieces can crack if handled roughly.
- Clean the Seals
Look at the rubber seals under the cylinder. Mineral buildup can stop them from sealing well. Soak the seals or dirty parts in white vinegar for a short time, then scrub gently with an old toothbrush. Rinse and dry everything.
- Replace Damaged Seals
If the seals look cracked, flat, or brittle, replace them. Cleaning may not help if the rubber has lost its shape. Use parts made for your faucet model when possible. This gives you the best chance of stopping the leak.
- Reassemble the Faucet
Put the seals, cylinder, mounting parts, cover, and handle back in place. Turn on the water slowly. Ceramic disc faucet repair can fail if water pressure hits the discs too fast, so open the shutoff valves with care.
How to Fix a Leak at the Faucet Base?
A leak at the base can make the counter or sink deck wet even when the spout is not dripping. This often points to worn O-rings, loose mounting parts, or water splashing from another area. First, find the true source.
- Find Where the Water Is Coming From
Dry the faucet, sink, and counter completely. Then turn the faucet on and watch closely. Water may appear near the handle, spout base, or mounting area. A dry paper towel can help you track the first wet spot.
- Tighten Loose Parts
Check the handle, spout collar, and mounting nut. Tighten loose parts gently. Do not crank down hard. Faucets are like eyeglasses: snug is good, but too much pressure can bend or crack something important.
- Replace Worn O-Rings
If water leaks around the spout base, the O-rings may be worn. Remove the spout according to your faucet type. Take off the old O-rings, install matching new ones, and add a light coat of plumber’s grease before reassembly.
- Test Around the Base
Turn the water back on and run the faucet for a few minutes. Move the handle and spout, if it swivels. Dry the area again and watch for new moisture. If it stays dry, the base leak is fixed.
How to Fix a Leak Under the Sink?
Sometimes the faucet itself is not the only problem. Water under the sink can come from supply lines, drain parts, shutoff valves, or loose connections. A leak below can damage cabinets fast, so check it carefully.
- Check Supply Lines
Use a flashlight to inspect the hot and cold water supply lines. Look for drips, rust, bulges, cracks, or wet spots. If you also have slow drainage or standing water, this unclog sink guide may help with a related kitchen sink issue.
- Tighten Loose Connections
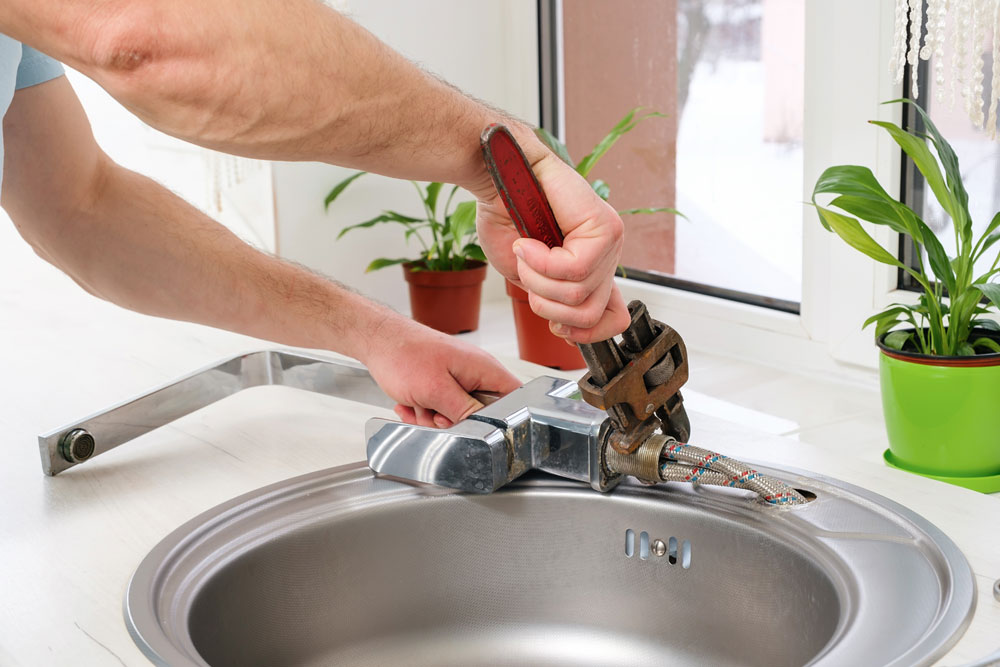
Loose supply line nuts can drip slowly. Use an adjustable wrench to tighten them slightly. Do not over-tighten because you can damage the threads or rubber washer inside. After tightening, dry the area and check again.
- Replace Old Hoses
Old supply hoses can crack or weaken over time. If a hose looks swollen, rusty, or damaged, replace it instead of trying to patch it. Flexible braided stainless steel lines are common and usually easy to install.
- Inspect Shutoff Valves
Shutoff valves can leak around the stem or connection points. If a valve drips after you touch it, it may need tightening, packing, or replacement. If the valve does not shut water off fully, call a professional before removing faucet parts.
- Dry and Test the Area
After repairs, dry the cabinet floor, pipes, and hoses. Place a paper towel under the connections and run the faucet. Check again after a few minutes. Paper towels show even small leaks because they reveal water marks quickly.
Mistakes to Avoid When Fixing a Leaky Faucet
A faucet repair is usually simple, but small mistakes can make the job harder. Slow down, stay organized, and test your work. Also, make sure the problem is truly a faucet leak, not a drain issue or clogged sink problem.
- Forgetting to Turn Off the Water
This is the biggest mistake. If you remove faucet parts before turning off the water, you may get a surprise spray. Always shut off the supply valves first. Then open the faucet to release pressure before taking anything apart.
- Buying the Wrong Part
A washer, O-ring, or cartridge that looks “close enough” may not seal correctly. Bring the old part with you or use the faucet model number. The right part can be the difference between a quick repair and a second trip.
- Over-Tightening Screws
It feels natural to tighten everything as much as possible, but faucets do not need brute force. Over-tightening can strip screws, crack handles, flatten washers, or damage seals. Tighten parts until snug, then stop.
- Losing Small Parts
Tiny screws, clips, springs, and washers can vanish fast. Cover the drain and keep parts in a bowl. Take photos as you go. A missing clip can stop the faucet from working even if every other part is correct.
- Skipping the Test Run
Do not clean up the tools until you test the faucet. Run hot and cold water. Move the handle. Check the spout, base, and under-sink area. A test run catches leaks before they damage cabinets or countertops.
When to Repair vs. Replace a Faucet
Sometimes the best answer is not how to fix a leaking faucet, but whether fixing it is worth it. Many faucets can be repaired cheaply. However, replacement may make more sense when the faucet is old, corroded, loose, or no longer fits your style.

- When Repair Makes Sense
Repair makes sense when the faucet is in good shape and the leak comes from a small part. A washer, O-ring, seal, spring, or cartridge is usually affordable. If the finish still looks good, repair is often the smarter choice.
- When Replacement Is Better
Replacement may be better if the faucet body is cracked, badly corroded, or hard to find parts for. It also makes sense if leaks keep returning. A very old faucet can become like an old umbrella: useful, but not worth fixing forever.
- Cost Comparison
A basic leaky faucet fix may cost only a few dollars for washers or O-rings. A cartridge or repair kit costs more, but still less than many new faucets. Replacement costs more upfront, especially if you hire help, but it may save repeat repairs.
- Style and Upgrade Options
A new faucet can refresh a kitchen or bathroom quickly. Matte black, brushed nickel, chrome, and brass finishes can change the whole mood of a sink area. If you already plan a small makeover, replacement may offer both function and style.
Budget-Friendly Faucet Upgrade Ideas
A faucet does more than control water. It also acts like jewelry for your sink. If your old faucet keeps leaking or looks dated, a smart upgrade can improve the room without a full remodel. Keep the choice practical and timeless.
- Choose a Simple Modern Style
Simple faucet shapes age well. A clean single-handle kitchen faucet or smooth two-handle bathroom faucet can look fresh for years. Avoid overly trendy shapes if you want a budget-friendly upgrade that will not feel outdated too soon.
- Match the Faucet Finish
Match the faucet finish with cabinet pulls, towel bars, lighting, or other hardware. The room feels more pulled together when finishes repeat. They do not need to match perfectly, but they should feel like they belong in the same family.
- Look for Water-Saving Features
Many modern faucets include water-saving aerators. These reduce flow while still feeling useful for washing hands or dishes. If you want to stop waste and improve daily use, a water-saving faucet can be a smart upgrade.
- Shop Replacement Parts First
Before buying a new faucet, check the cost of repair parts. Sometimes a $5 washer solves the problem. Other times, a hard-to-find cartridge costs enough that replacement makes more sense. Compare both options before deciding.
- Reuse Tools When Possible
The tools you buy for one faucet job can help with many future repairs. Keep your wrench, screwdrivers, plumber’s tape, and pliers in a small home repair kit. This makes the next DIY faucet repair faster and cheaper.
How to Prevent Future Faucet Leaks?
Once you know how to fix a leaky faucet, the next goal is prevention. A few small habits can keep the faucet working longer. Good maintenance is like brushing your teeth: simple, quick, and much better than dealing with a bigger problem later.
- Clean Around the Faucet Often
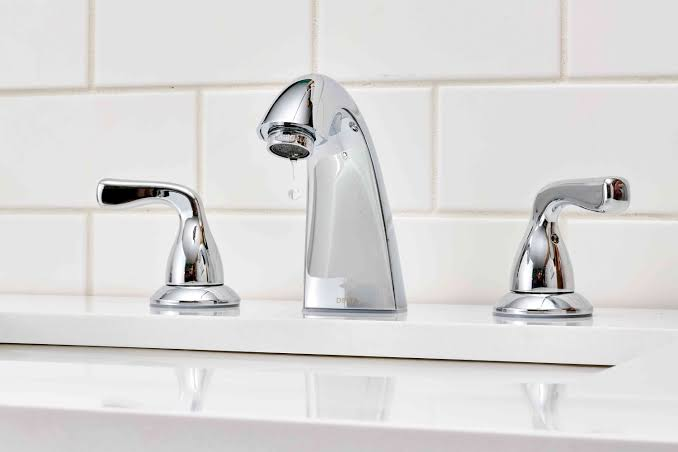
Wipe around the faucet base, handles, and spout to remove water spots and mineral buildup. This keeps seals cleaner and helps you notice early leaks. If water has reached nearby storage areas, use this clean cabinets guide to protect the space.
- Avoid Forcing Handles
Do not crank handles too hard when turning water off. Forcing handles can crush washers and stress cartridges. Turn the faucet off gently. If you must push hard to stop water, the faucet already needs attention.
- Watch for Early Drips
A slow drip is an early warning sign. Fixing it right away usually means replacing a small part. Waiting can damage more parts. If your faucet leaking when turned off gets worse, inspect it before the problem spreads.
- Replace Worn Parts Early
Washers, O-rings, seals, and cartridges do not last forever. If you open the faucet for one repair and see another worn part, replace it while you are there. This saves time and helps prevent repeat leaks.
- Check Water Pressure
High water pressure can wear down faucet parts faster. If several faucets drip, toilets run, or pipes bang, pressure may be too high. A plumber can test pressure and install or adjust a pressure-reducing valve if needed.
When to Call a Plumber?
DIY is great, but some leaks need expert help. Call a plumber when the repair feels unsafe, the leak keeps returning, or the shutoff valves do not work. For bigger plumbing issues, a trusted plumber repair resource can help you understand when professional help makes sense.
- The Leak Keeps Coming Back
If you replace parts and the leak returns, another issue may be hiding inside the faucet or plumbing. A damaged valve seat, high water pressure, or worn faucet body can cause repeat leaks. At that point, a plumber can diagnose the real cause.
- Pipes Are Damaged
If you see cracked, rusty, or leaking pipes, stop and get help. Pipe damage can cause water damage quickly. Do not try to force old pipes apart unless you know what you are doing, because they can break.
- Shutoff Valves Do Not Work
If the shutoff valves under the sink do not stop water, do not remove faucet parts. You need reliable water control before repair. A plumber can replace the valves and make future repairs safer and easier.
- Water Damage Appears
Soft cabinet floors, peeling paint, stains, moldy smells, or swollen wood are warning signs. Water may have been leaking longer than you thought. Fix the leak first, then dry and repair the damaged area.
- The Faucet Is Hard to Access
Some faucets sit in tight spaces with hard-to-reach nuts and hoses. If you cannot reach the parts safely, hiring help may save time and stress. A difficult repair can turn simple only when the right tools are used.
Conclusion
Knowing how to fix a leaky faucet gives you more control over your home. Many leaks come from small worn parts, such as washers, O-rings, cartridges, springs, or seals. With basic tools, careful preparation, and patience, you can often stop the drip yourself. Start by identifying the faucet type, then follow the right repair steps. If the leak is under the sink, returns often, or involves damaged pipes, call a plumber before the problem grows.
Frequently Asked Questions
Look at the handle style. Compression faucets usually have two handles that tighten down. Ball faucets often have one handle over a rounded cap. Cartridge and ceramic disc faucets move more smoothly and may have one or two handles.
Yes, many faucet leaks are simple DIY repairs. If the leak comes from a washer, O-ring, cartridge, seal, or spring, you can often fix it with basic tools. Call a plumber if pipes, valves, or water damage are involved.
The valve seat may be corroded, the wrong washer may have been used, or another part may be worn. Check the O-ring, stem, and valve seat. If the drip continues, the faucet may need deeper repair.
A basic repair can cost only a few dollars for washers or O-rings. Cartridges and repair kits cost more. Hiring a plumber costs more, but it may be worth it for difficult leaks or damaged plumbing.
A simple leaky faucet repair may take 20 to 60 minutes. The time depends on the faucet type, the leak location, and how easy the parts are to remove. Stuck or corroded parts can take longer.
Repair it if the faucet still looks good and parts are easy to find. Replace it if the faucet is cracked, corroded, outdated, or keeps leaking after repairs. Replacement can also improve style and water efficiency.
Most repairs need an adjustable wrench, screwdrivers, Allen wrench, pliers, towels, and replacement parts. You may also need plumber’s grease, white vinegar, and a faucet repair kit based on your faucet type.
Yes, even a slow drip can waste a surprising amount of water over time. It may also leave stains, mineral buildup, and moisture damage. Fixing the drip quickly protects both your home and your water bill.
A base leak often comes from worn O-rings, loose parts, or a damaged seal. Dry the area first, then run the faucet and watch where the water appears. Replacing O-rings often solves this problem.
Call a plumber if the leak keeps coming back, pipes are damaged, shutoff valves do not work, water damage appears, or the faucet is hard to access. Professional help is also smart when you feel unsure or unsafe.